Overview #
The Management Plan is the engine, or the scheduler, of the system. Each facility, or location, has its own Management Plan, which consists of a list of Plan Items. Plan Items schedule and assign recurring events based on the frequency, initial due date, and assignment. Each row in the Management Plan Table represents one Plan Item.
How to create a new Management Plan Item: #
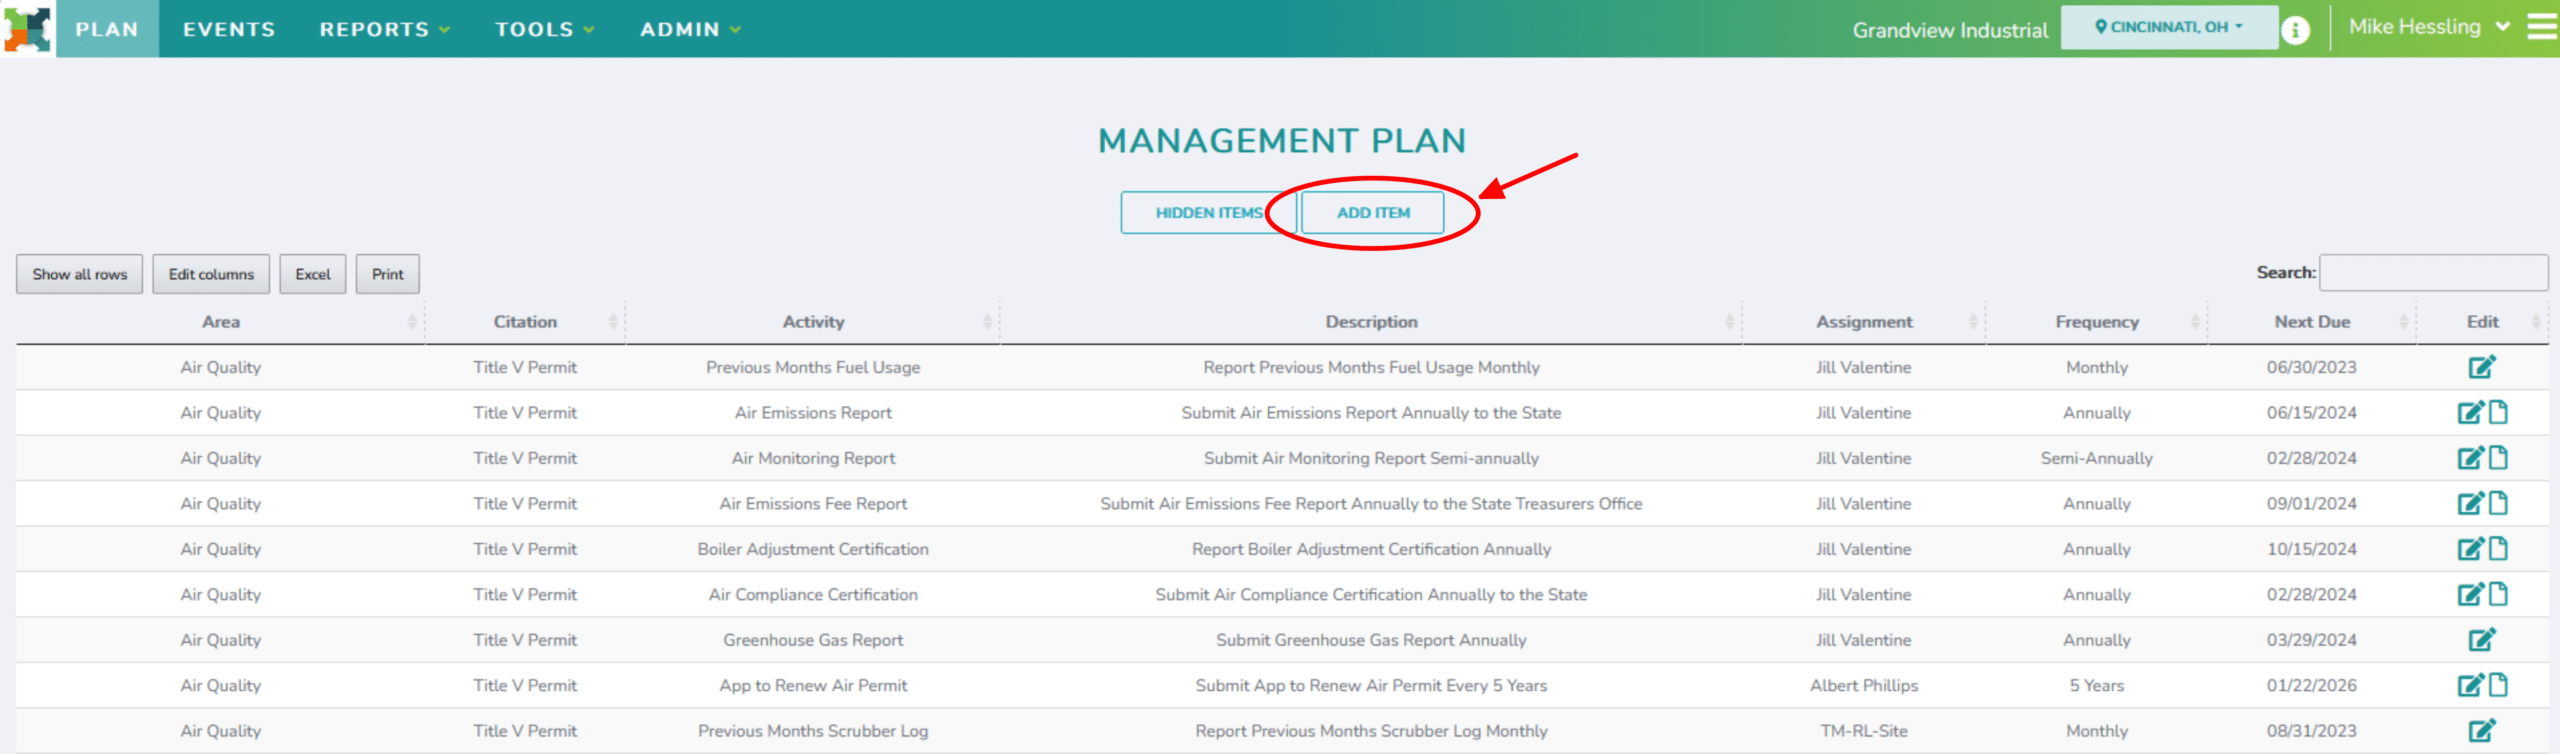
- Click on the ‘Plan’ tab located on the task bar at the top of the PlanTRAK website
- Select the ‘Add Item’ button
3. To create a new Plan Item, users must populate a number of various fields:
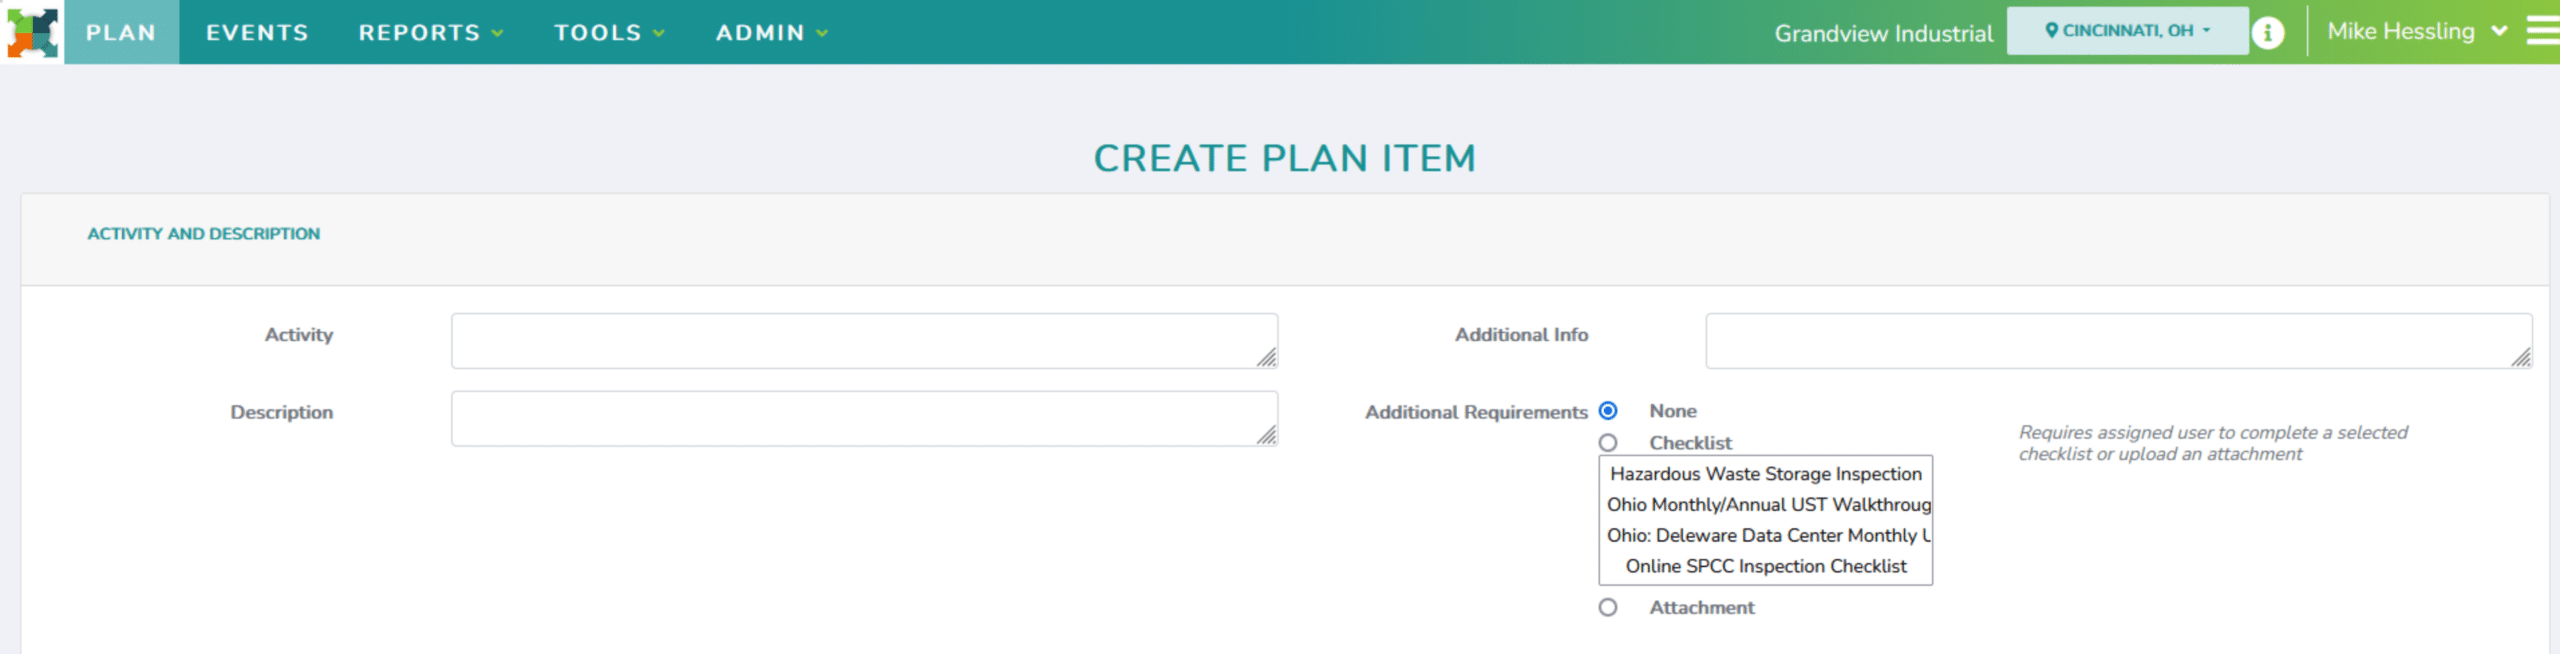
- Activity: a short title of the Plan Item/Event
- Description: a brief description of what needs to be completed
- Additional Information: useful information for completing an Event
- This information will appear in email notifications and on the View Event page.
- Additional Requirement: an option to require a checklist to be completed or document to be attached before the Event can be completed

- Assignment: the user responsible for completing the event
- Next Event to be Generated: the due date of the next Event to be created by this Plan Item.
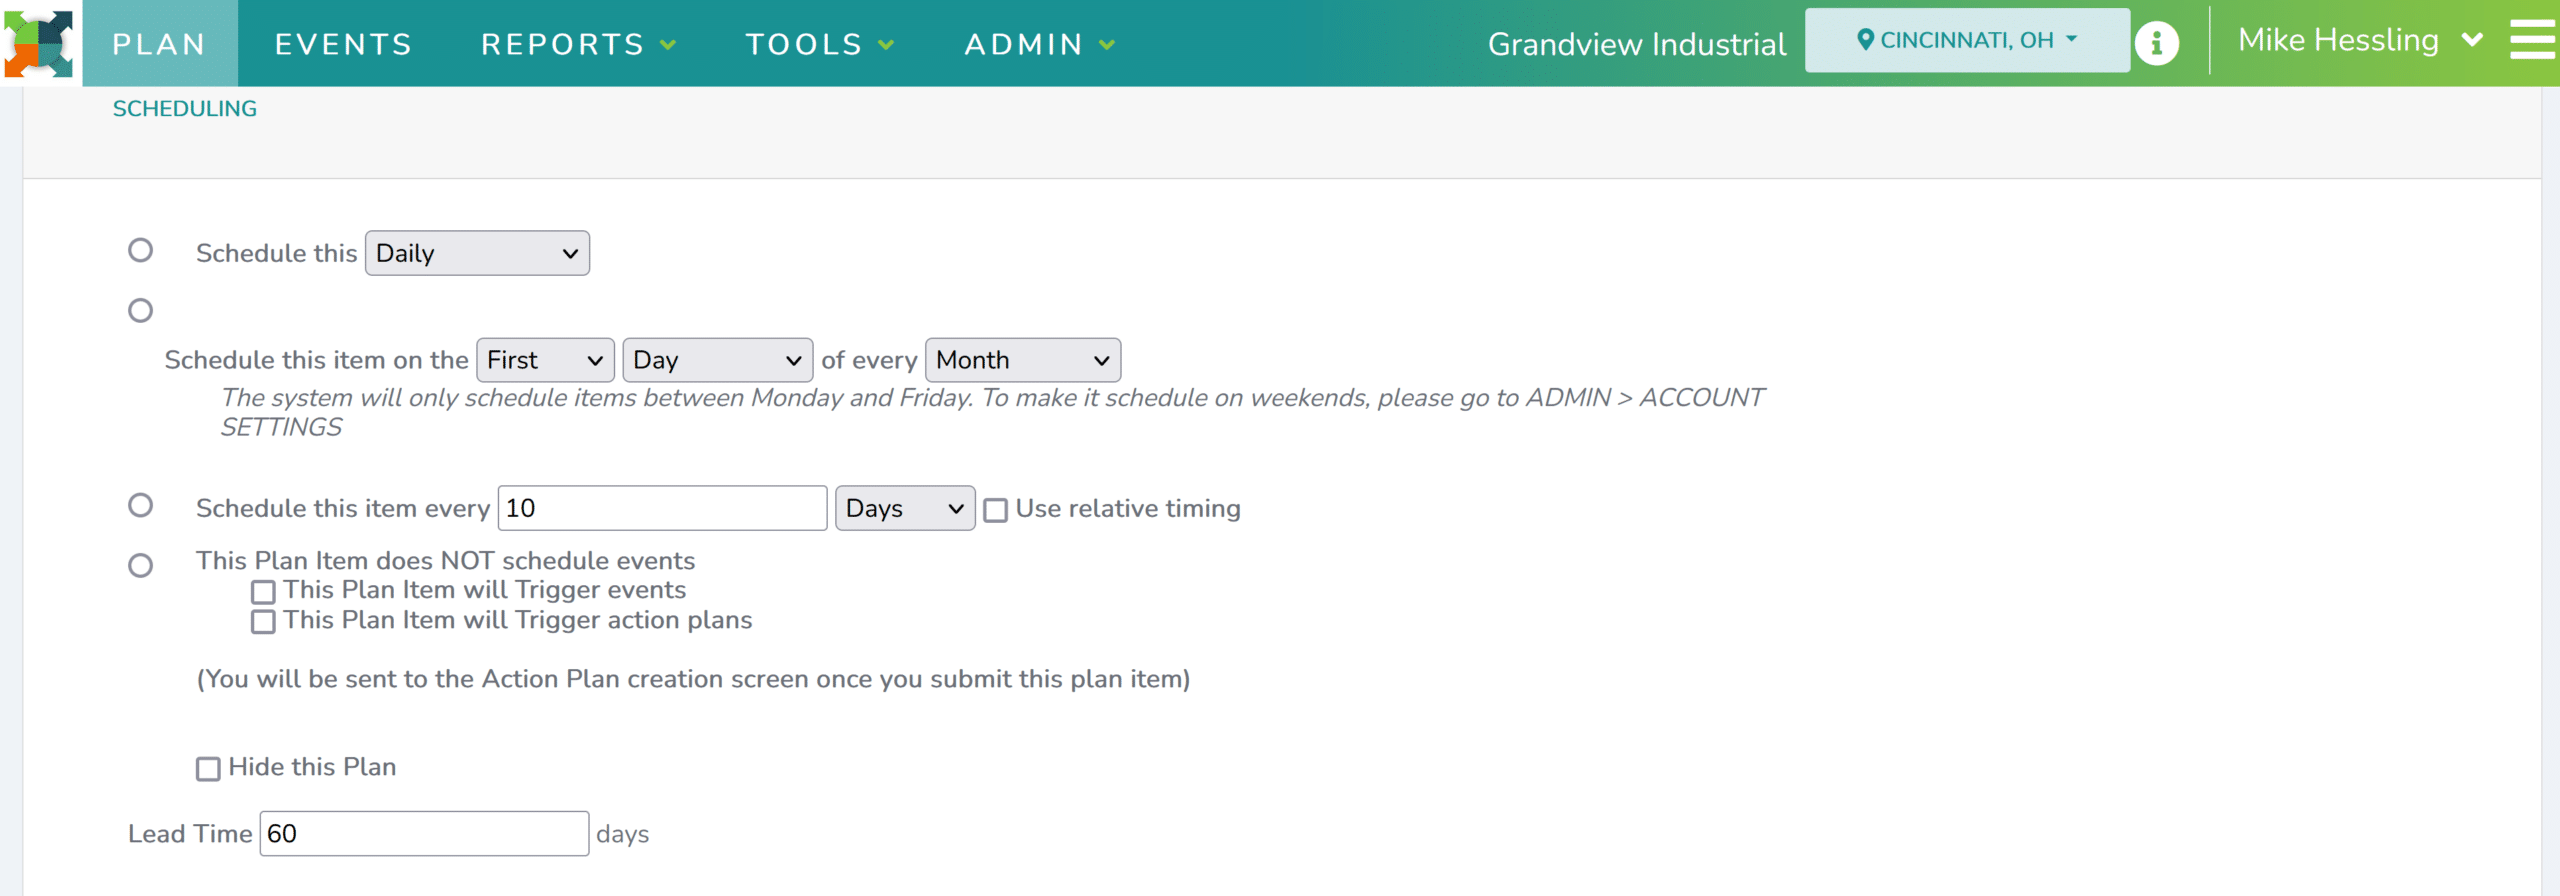
- Scheduling: There are various options for how frequently and on which day the Events are created
-
- For example, events can be scheduled for the last day of the month, the first Monday of every month, every number of days, and so on.
- Relative Timing: schedule an event every number of days, weeks, months, or years based on when the last event was completed.
- For example: You have an event that needs to be completed once every 365 days. Select “Schedule this item every ‘365 Days’ and Select the ‘Use relative timing’ checkbox. If the first event is completed on 4/4/2020, the next due date will be on 4/4/2021.
- Other Scheduling Options:
- Deactivating/Hiding Plan Items: Select ‘This Plan Item Does NOT Schedule Events’ if you would also like to Hide the Plan Item from the Management Plan Table, select the ‘Hide this Plan’ button.
- Triggered Events/Action Plans: This is an option to create a Plan Item that only creates events with you click a ‘Trigger’ button on the Management Plan Table. Once triggered, the Plan Item will create an Event or an Action Plan (a series of Events)
- Lead Time: Indicates how many days before the due date the Event will become available to the assigned user
-

- Notification Lists: lists of users to be added to email notifications and the number of days from the due date the notifications are sent
- There are four notification lists: Reminder Notify, Warning Notify, Overdue, and Overdue Reminder.
- The assigned user is automatically added to all Notification Lists.
- Users added to a Notification List will automatically be added to the following Notifications Lists. For example, a user that is added to the Warning Notify list will receive the Warning Notifications, Overdue Notifications, and Overdue Reminder Notifications.
- If you would like to remove the Reminder or Warning Notifications for a given Plan Item, type ‘0’ into the ‘days’ input box for that Notification List.
- Overdue Reminders are sent based on a number of days that is set for the entire system. The default is 5 days.
-
-
- Note: Hold the Ctrl key down to select/deselect multiple users on the Notification Lists
-
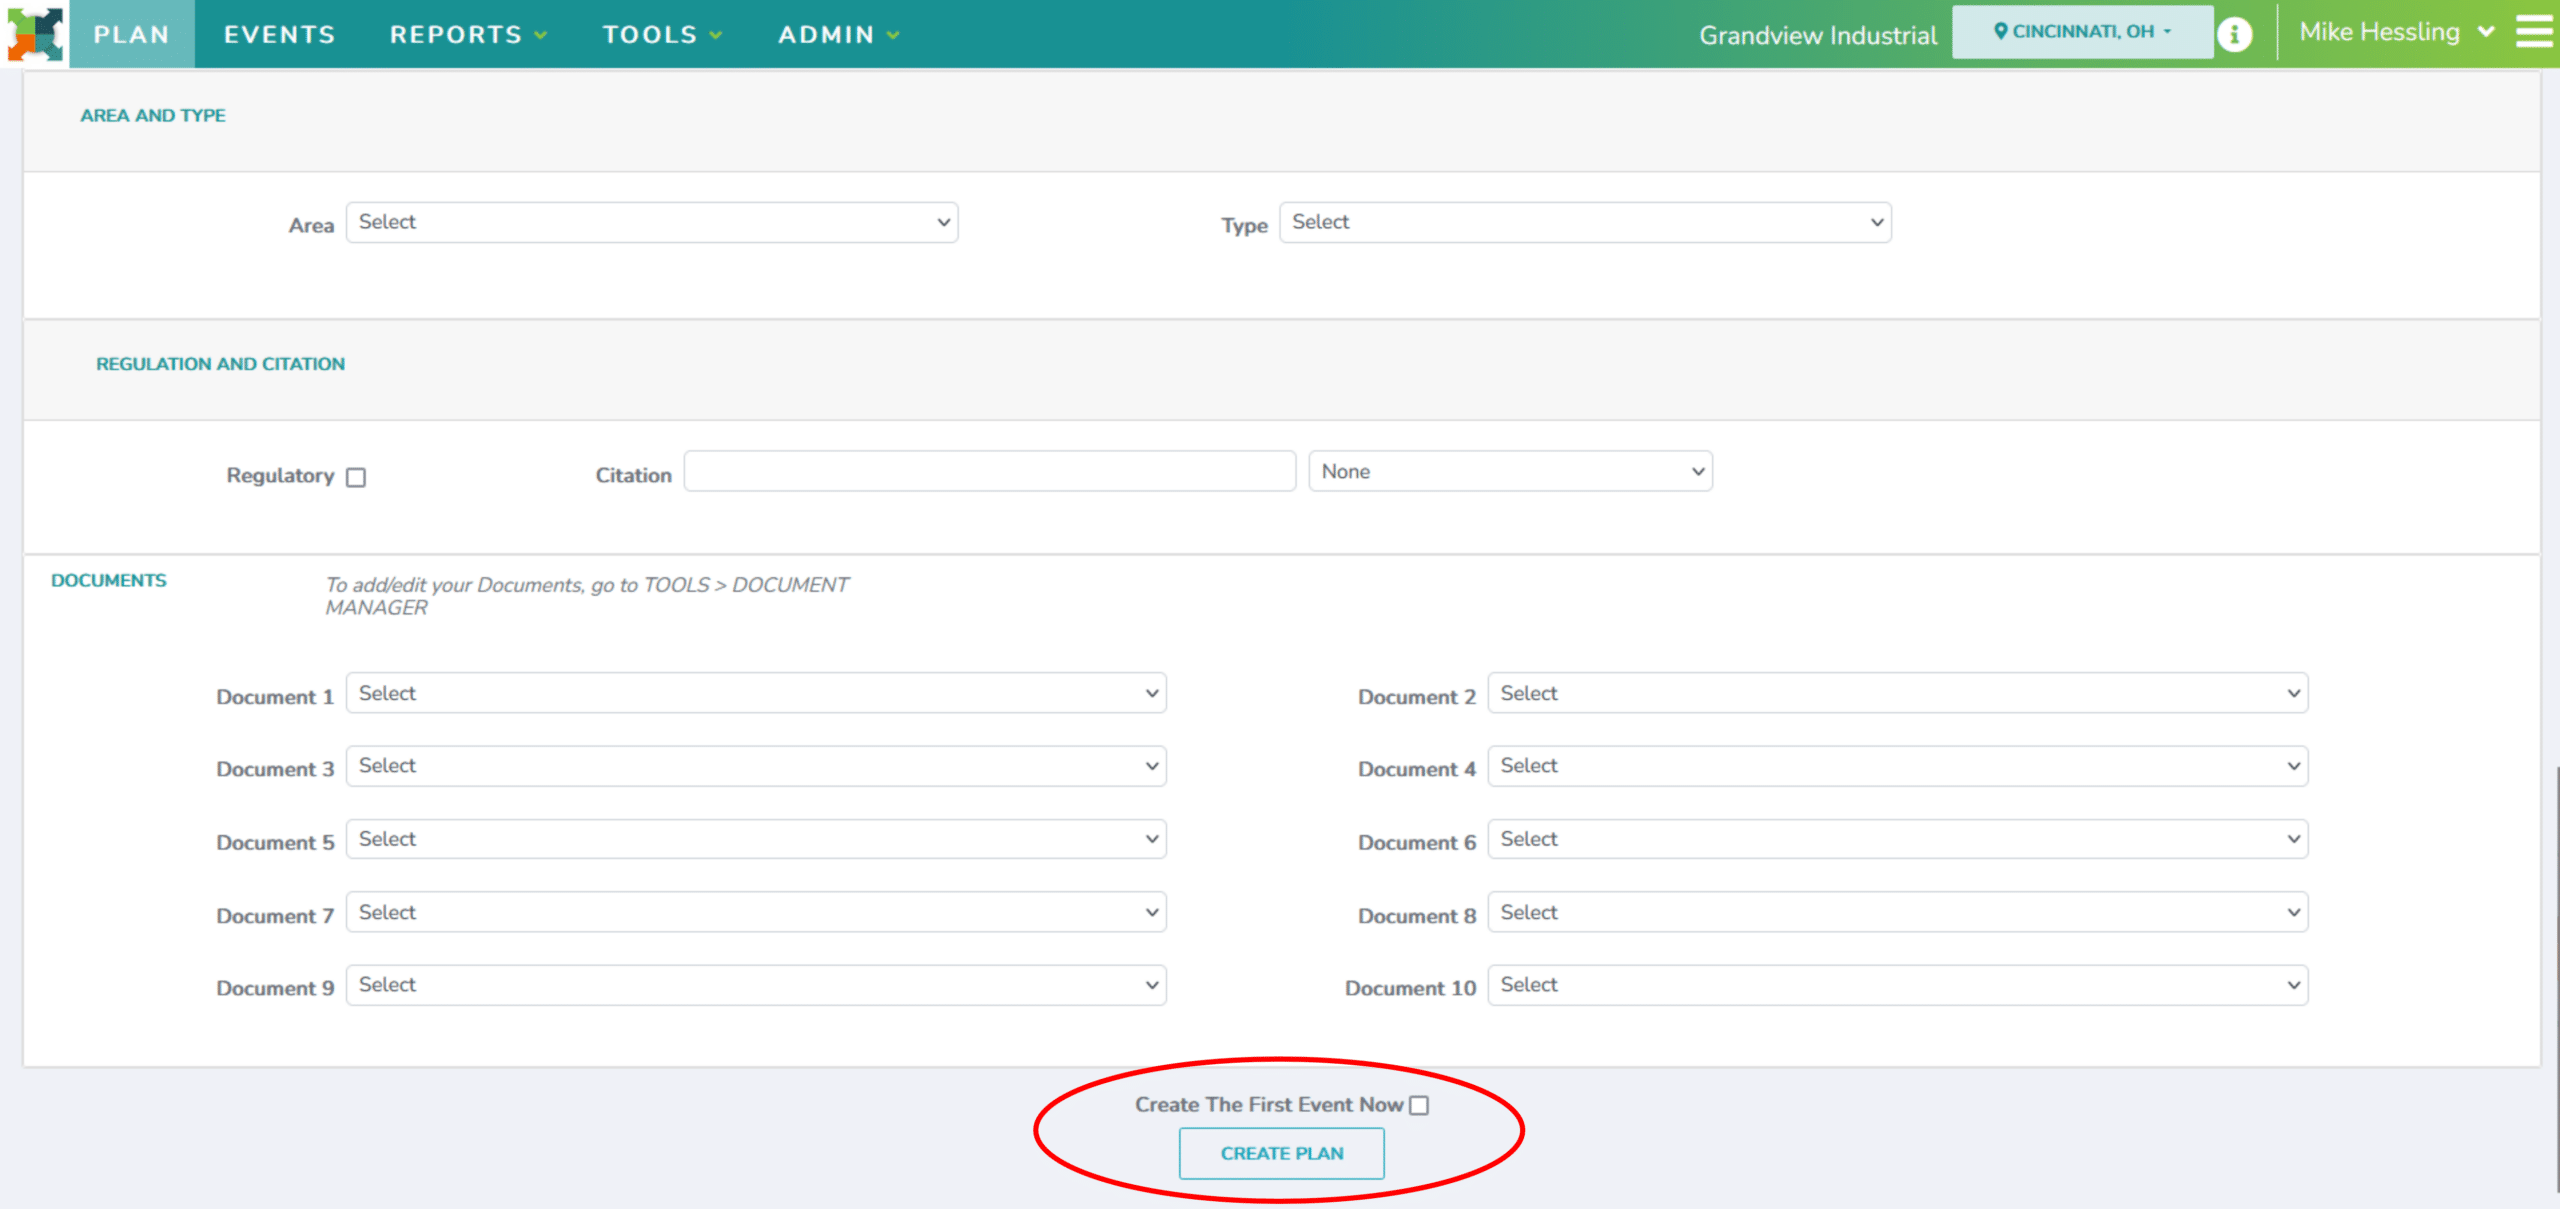
- Area & Type:
- Area indicates the Compliance Area associated with the Plan Item; for example, ‘Air Quality’ or ‘Storm Water’.
- Type indicates the type of task that needs to be completed; for example, ‘Sampling Event’ or ‘Permit Application’.
- Regulation & Citation: indicates if a plan item is part of regulatory requirement and allows you to reference why this plan item is required
- For example, a permit, regulation, or internal document may be referenced.
- Documents: reference documents attached to events created by the Plan Item
- Each plan item can hold up to 10 reference documents. Select documents from the drop down.
4. Select the ‘Create Plan’ button to create a new plan item
-
- Select ‘Create The First Event Now’ if plan item is ready to be assigned and implemented.
#
How to Stop Scheduling a Plan Item? #
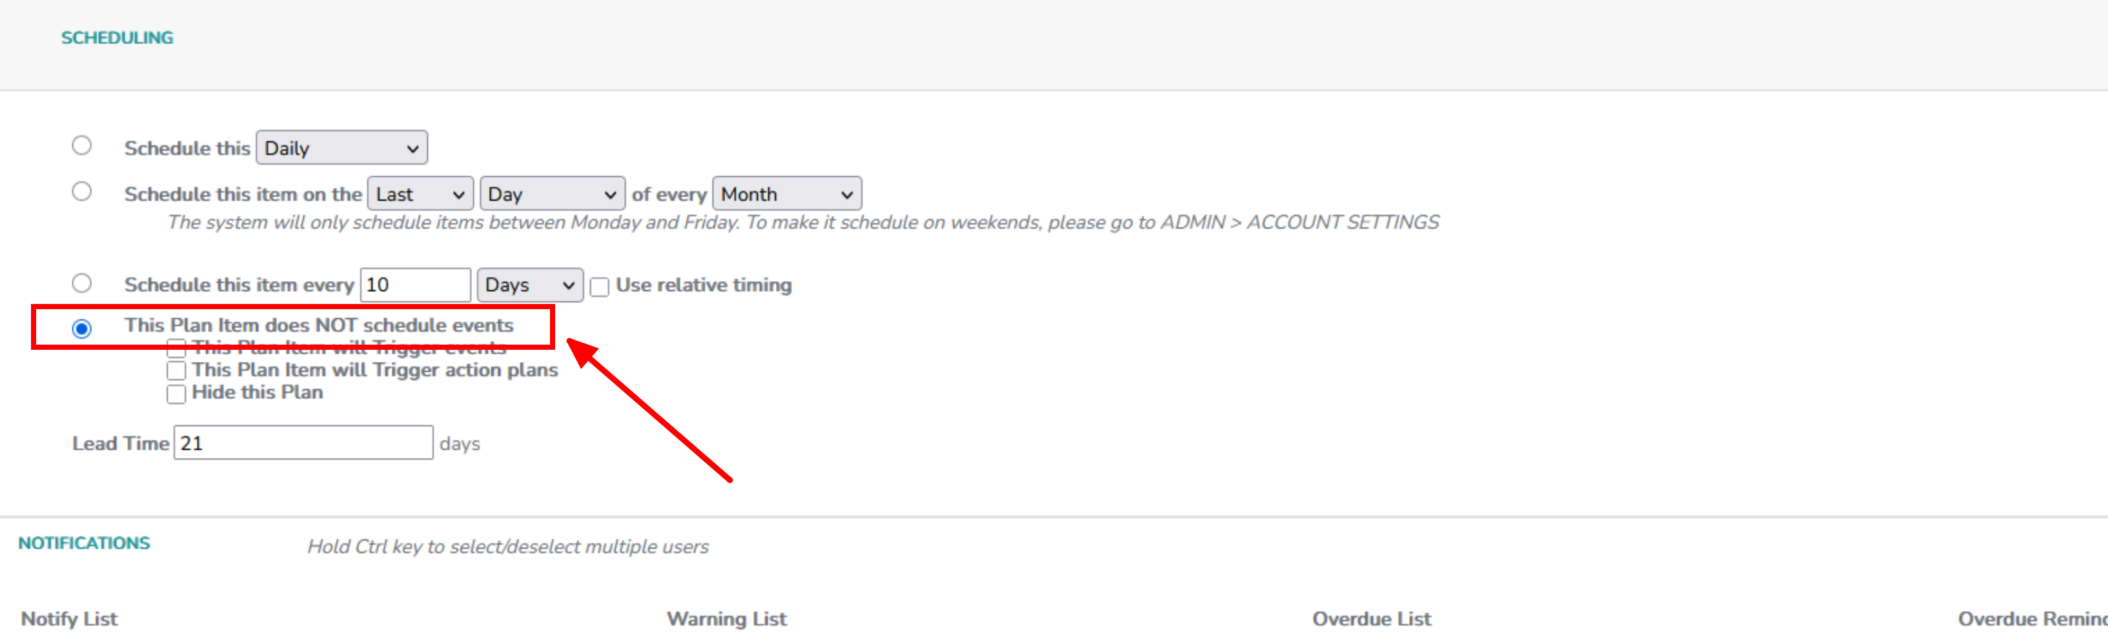
When updating a Plan Items that no longer need to be scheduled, navigate to the Scheduling section within the Plan Item. Select ‘This Plan Item Does NOT Schedule Events”.
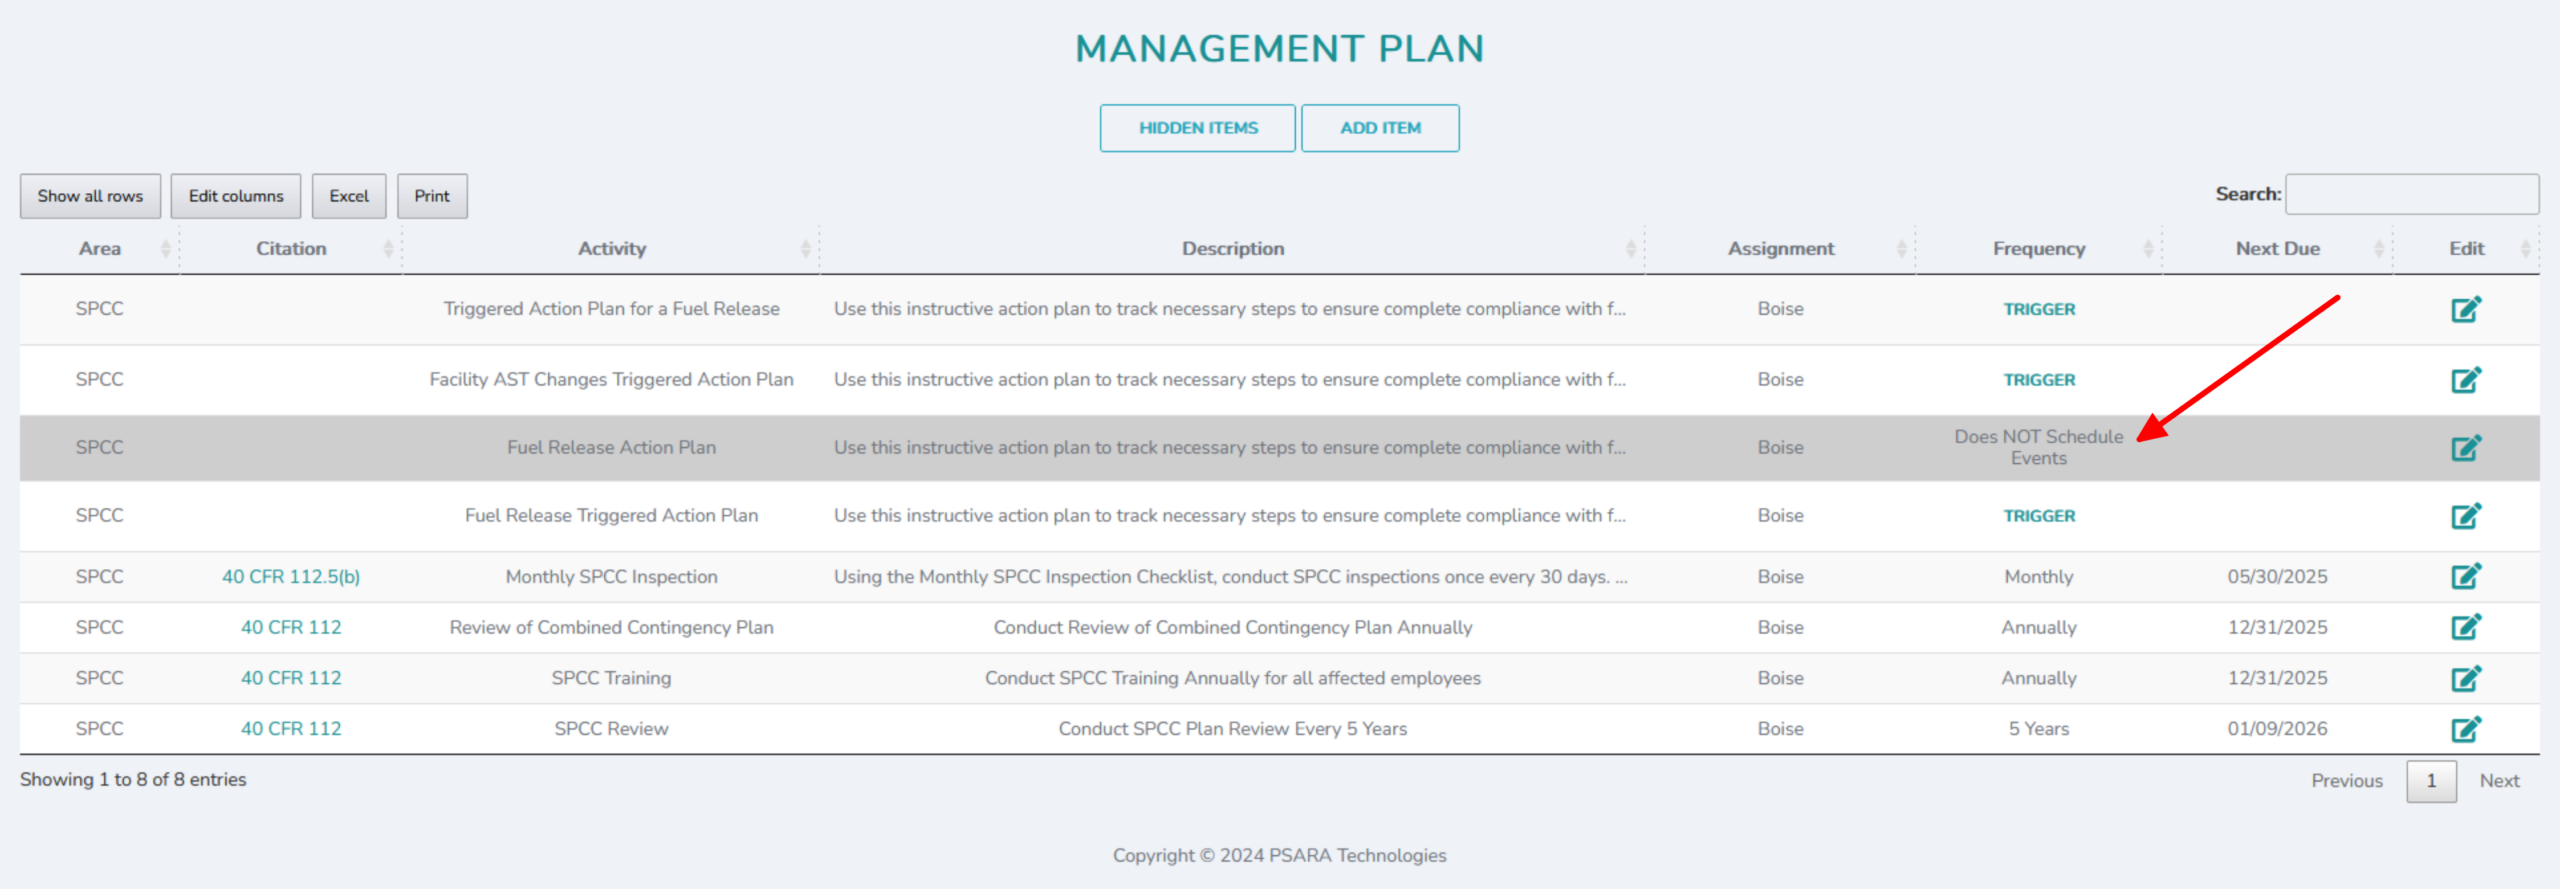
This will ensure that no new Events will be created for this Plan Item going forward and will grey out the Plan Item in the Management Plan Table.
#
How to Hide a Plan Item? #
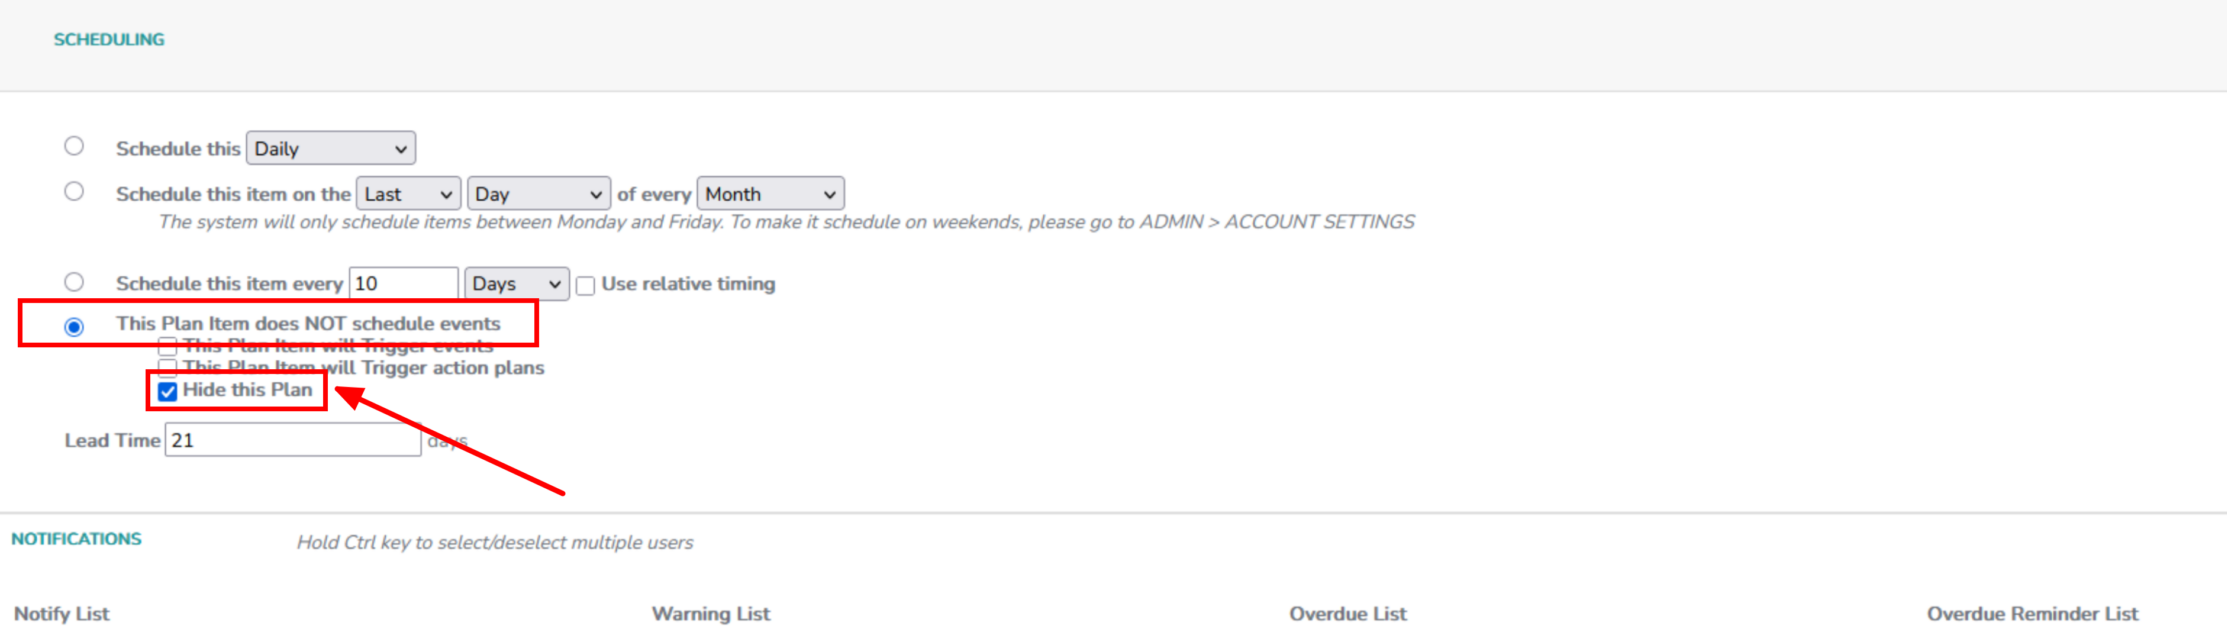
To hide Plan Items from the Management Plan Table, the Plan Item must first be set to “This Plan Item Does NOT Schedule Events” under the Scheduling section.
After turning off scheduling for the Plan Item, select the box labeled “Hide this Plan”. This will remove the Plan Item from view in the Management Plan Table while retaining all historical data for record-keeping purposes.
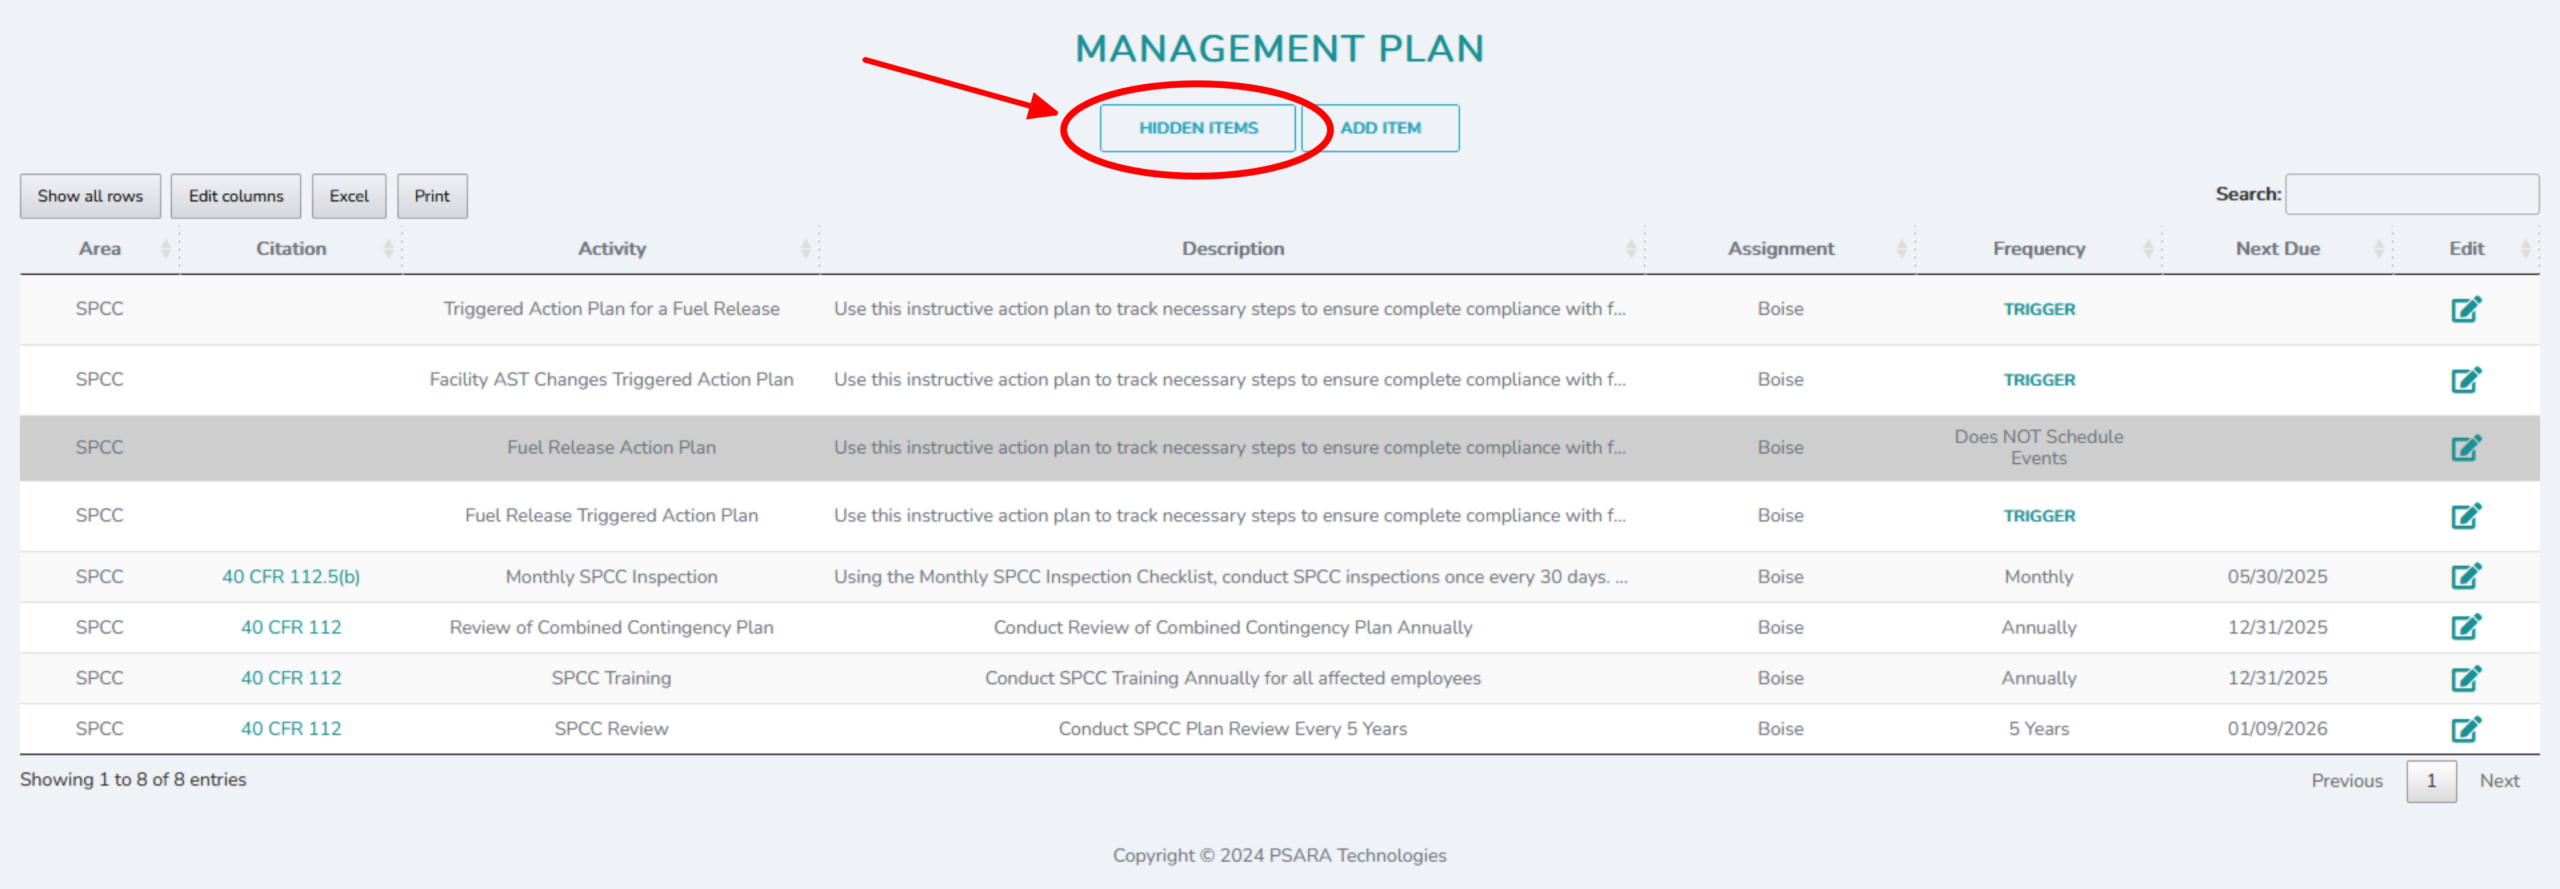
Though Hidden Plan Items are no longer listed on the Management Plan Table, they can still be accessed and viewed by selecting the “Hidden Items” button within the Management Plan page.
*Directors and Managers are the only ones who can view Management Plans. Only Directors can edit and create Management Plan Items.