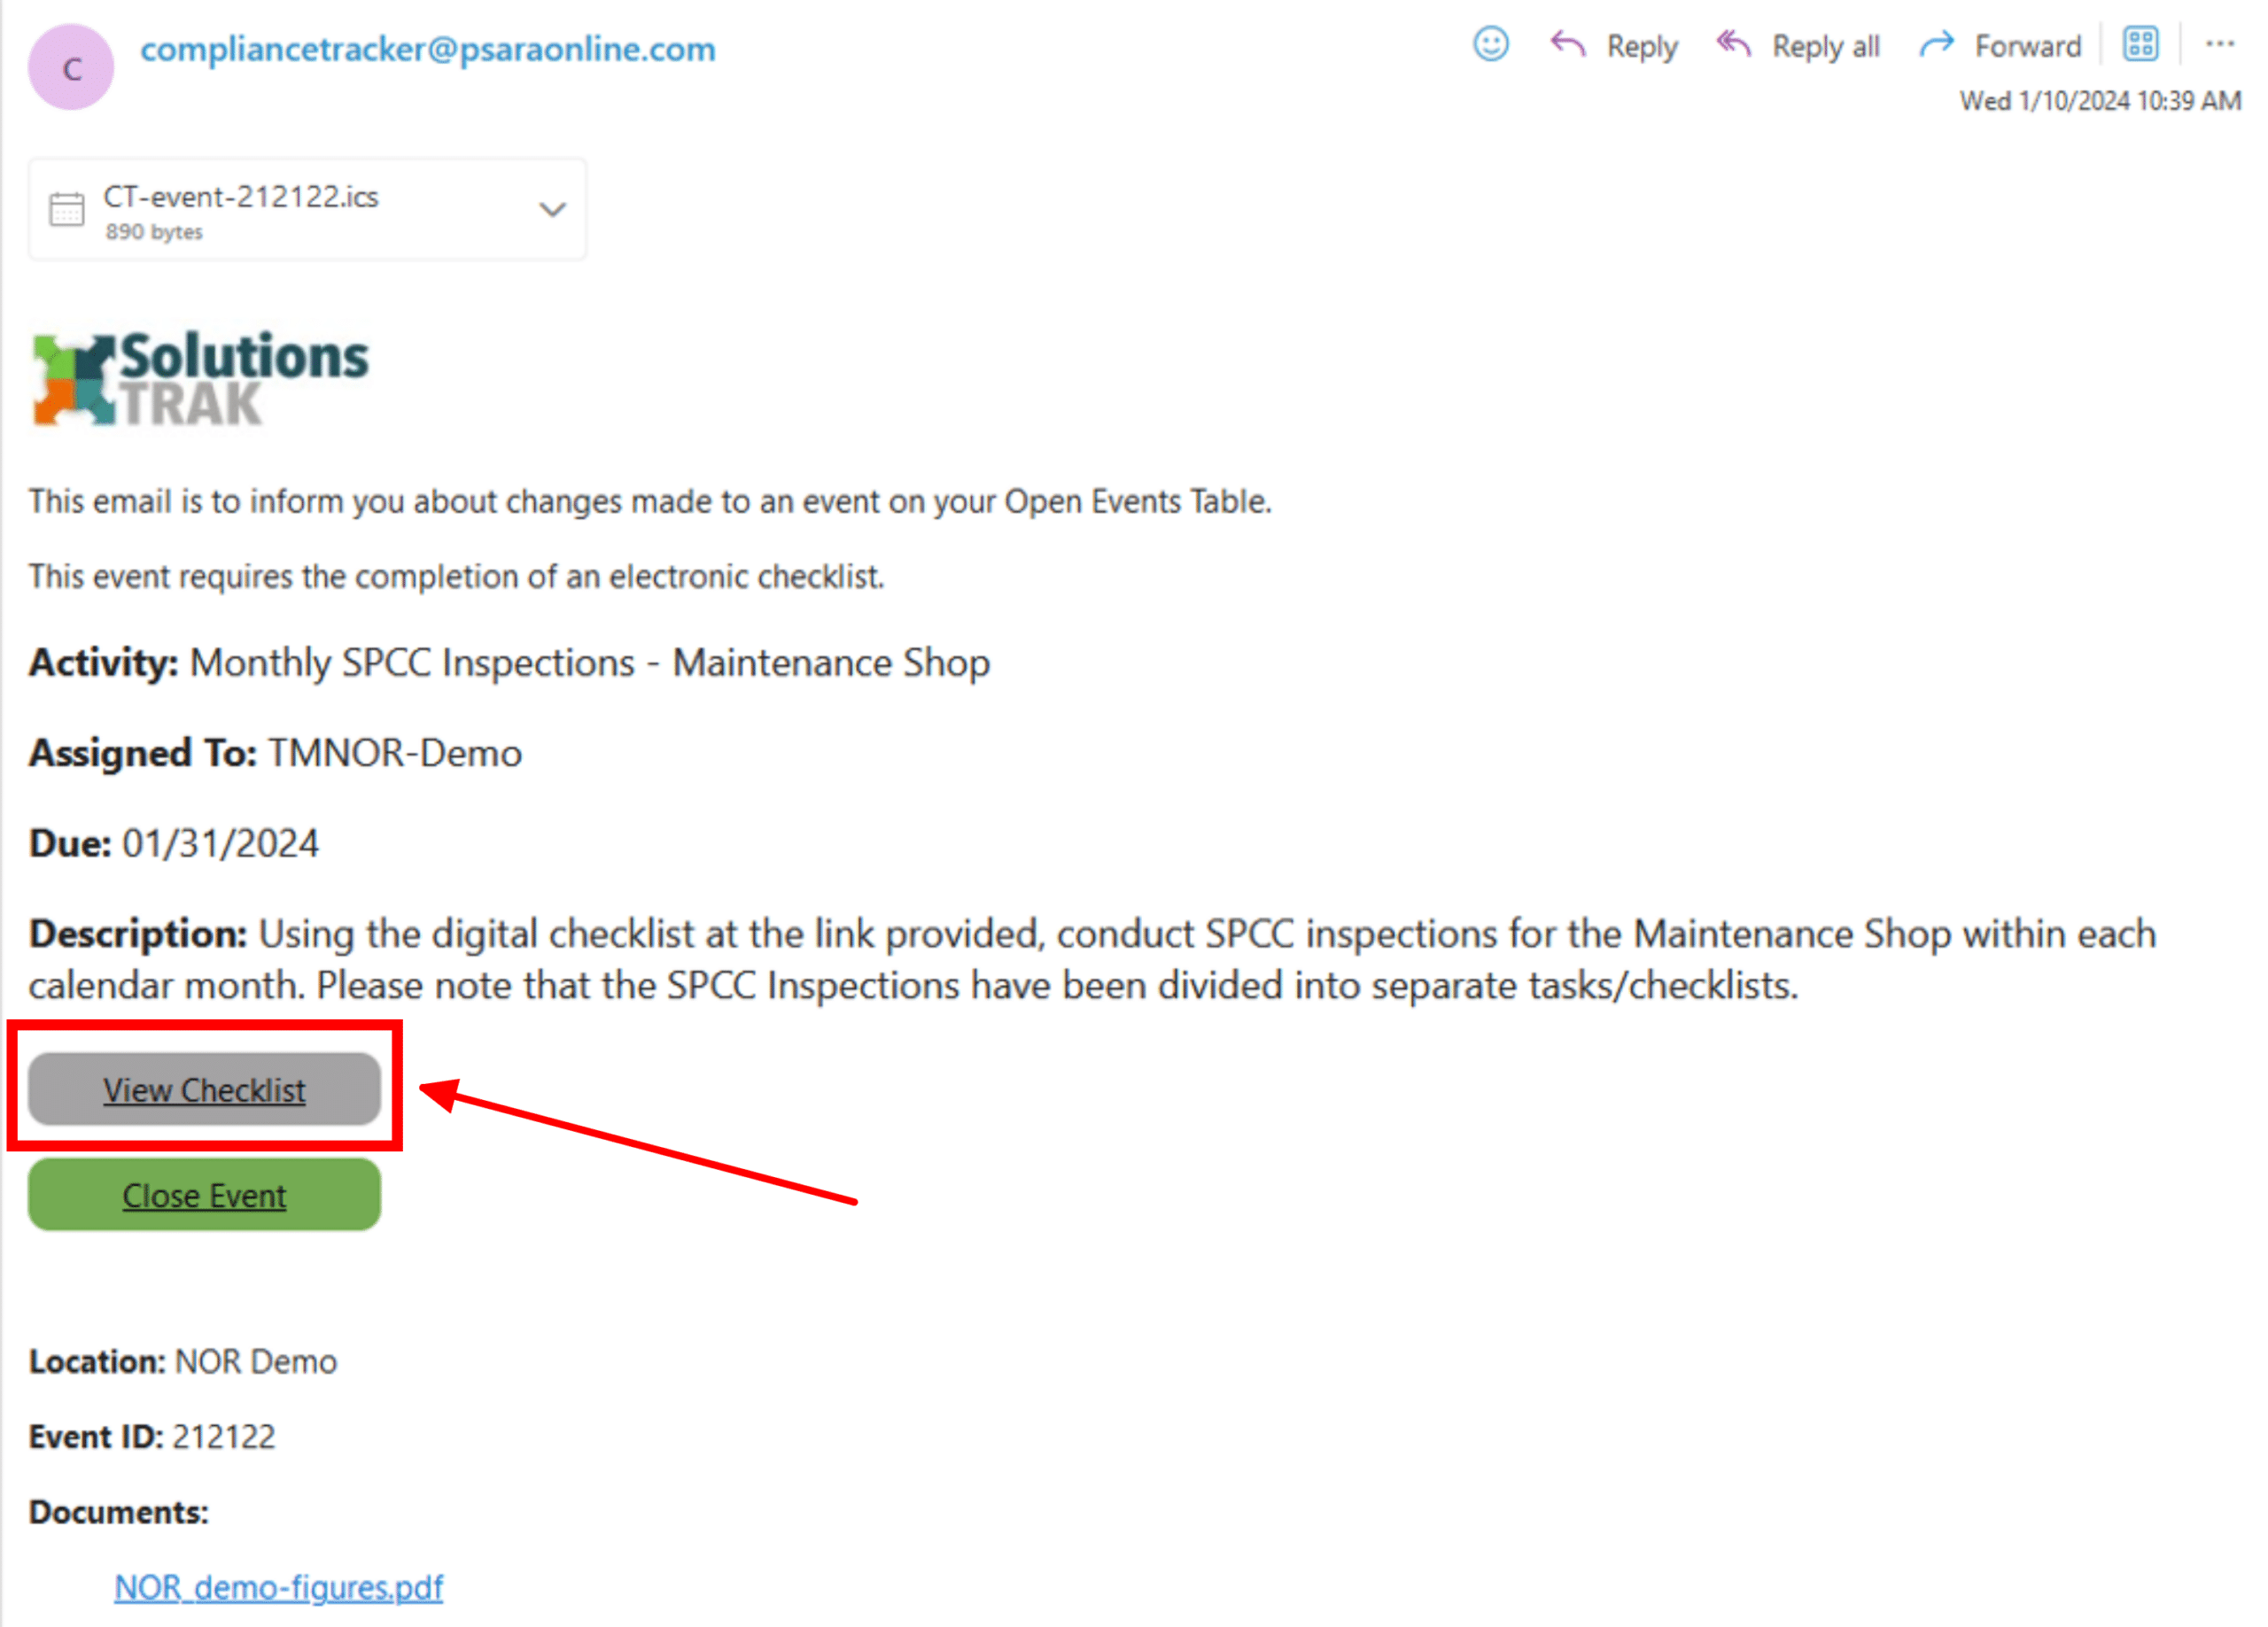
How to View Checklists: #
There are three ways to open/view your checklist:
- From the “View Checklist” link in the event email
2. From the “Checklist” Button on the Open Events table

3. From the “View Checklist” link on the Close Event Page

How to Complete Checklists: #
PDF Checklist: #
- Once you have filled out and completed the PDF Checklist attached to an Event, scan and save a copy to your device.
- Access the desired Checklist or Plan Item, following the above steps.
- To attach the completed PDF Checklist to an Event, select the ‘Check mark’ icon located in the far right column titled, ‘Options’ of the Open Events Table
- The following screen will populate, select the ‘Browse’ button and select the PDF Checklist from your files
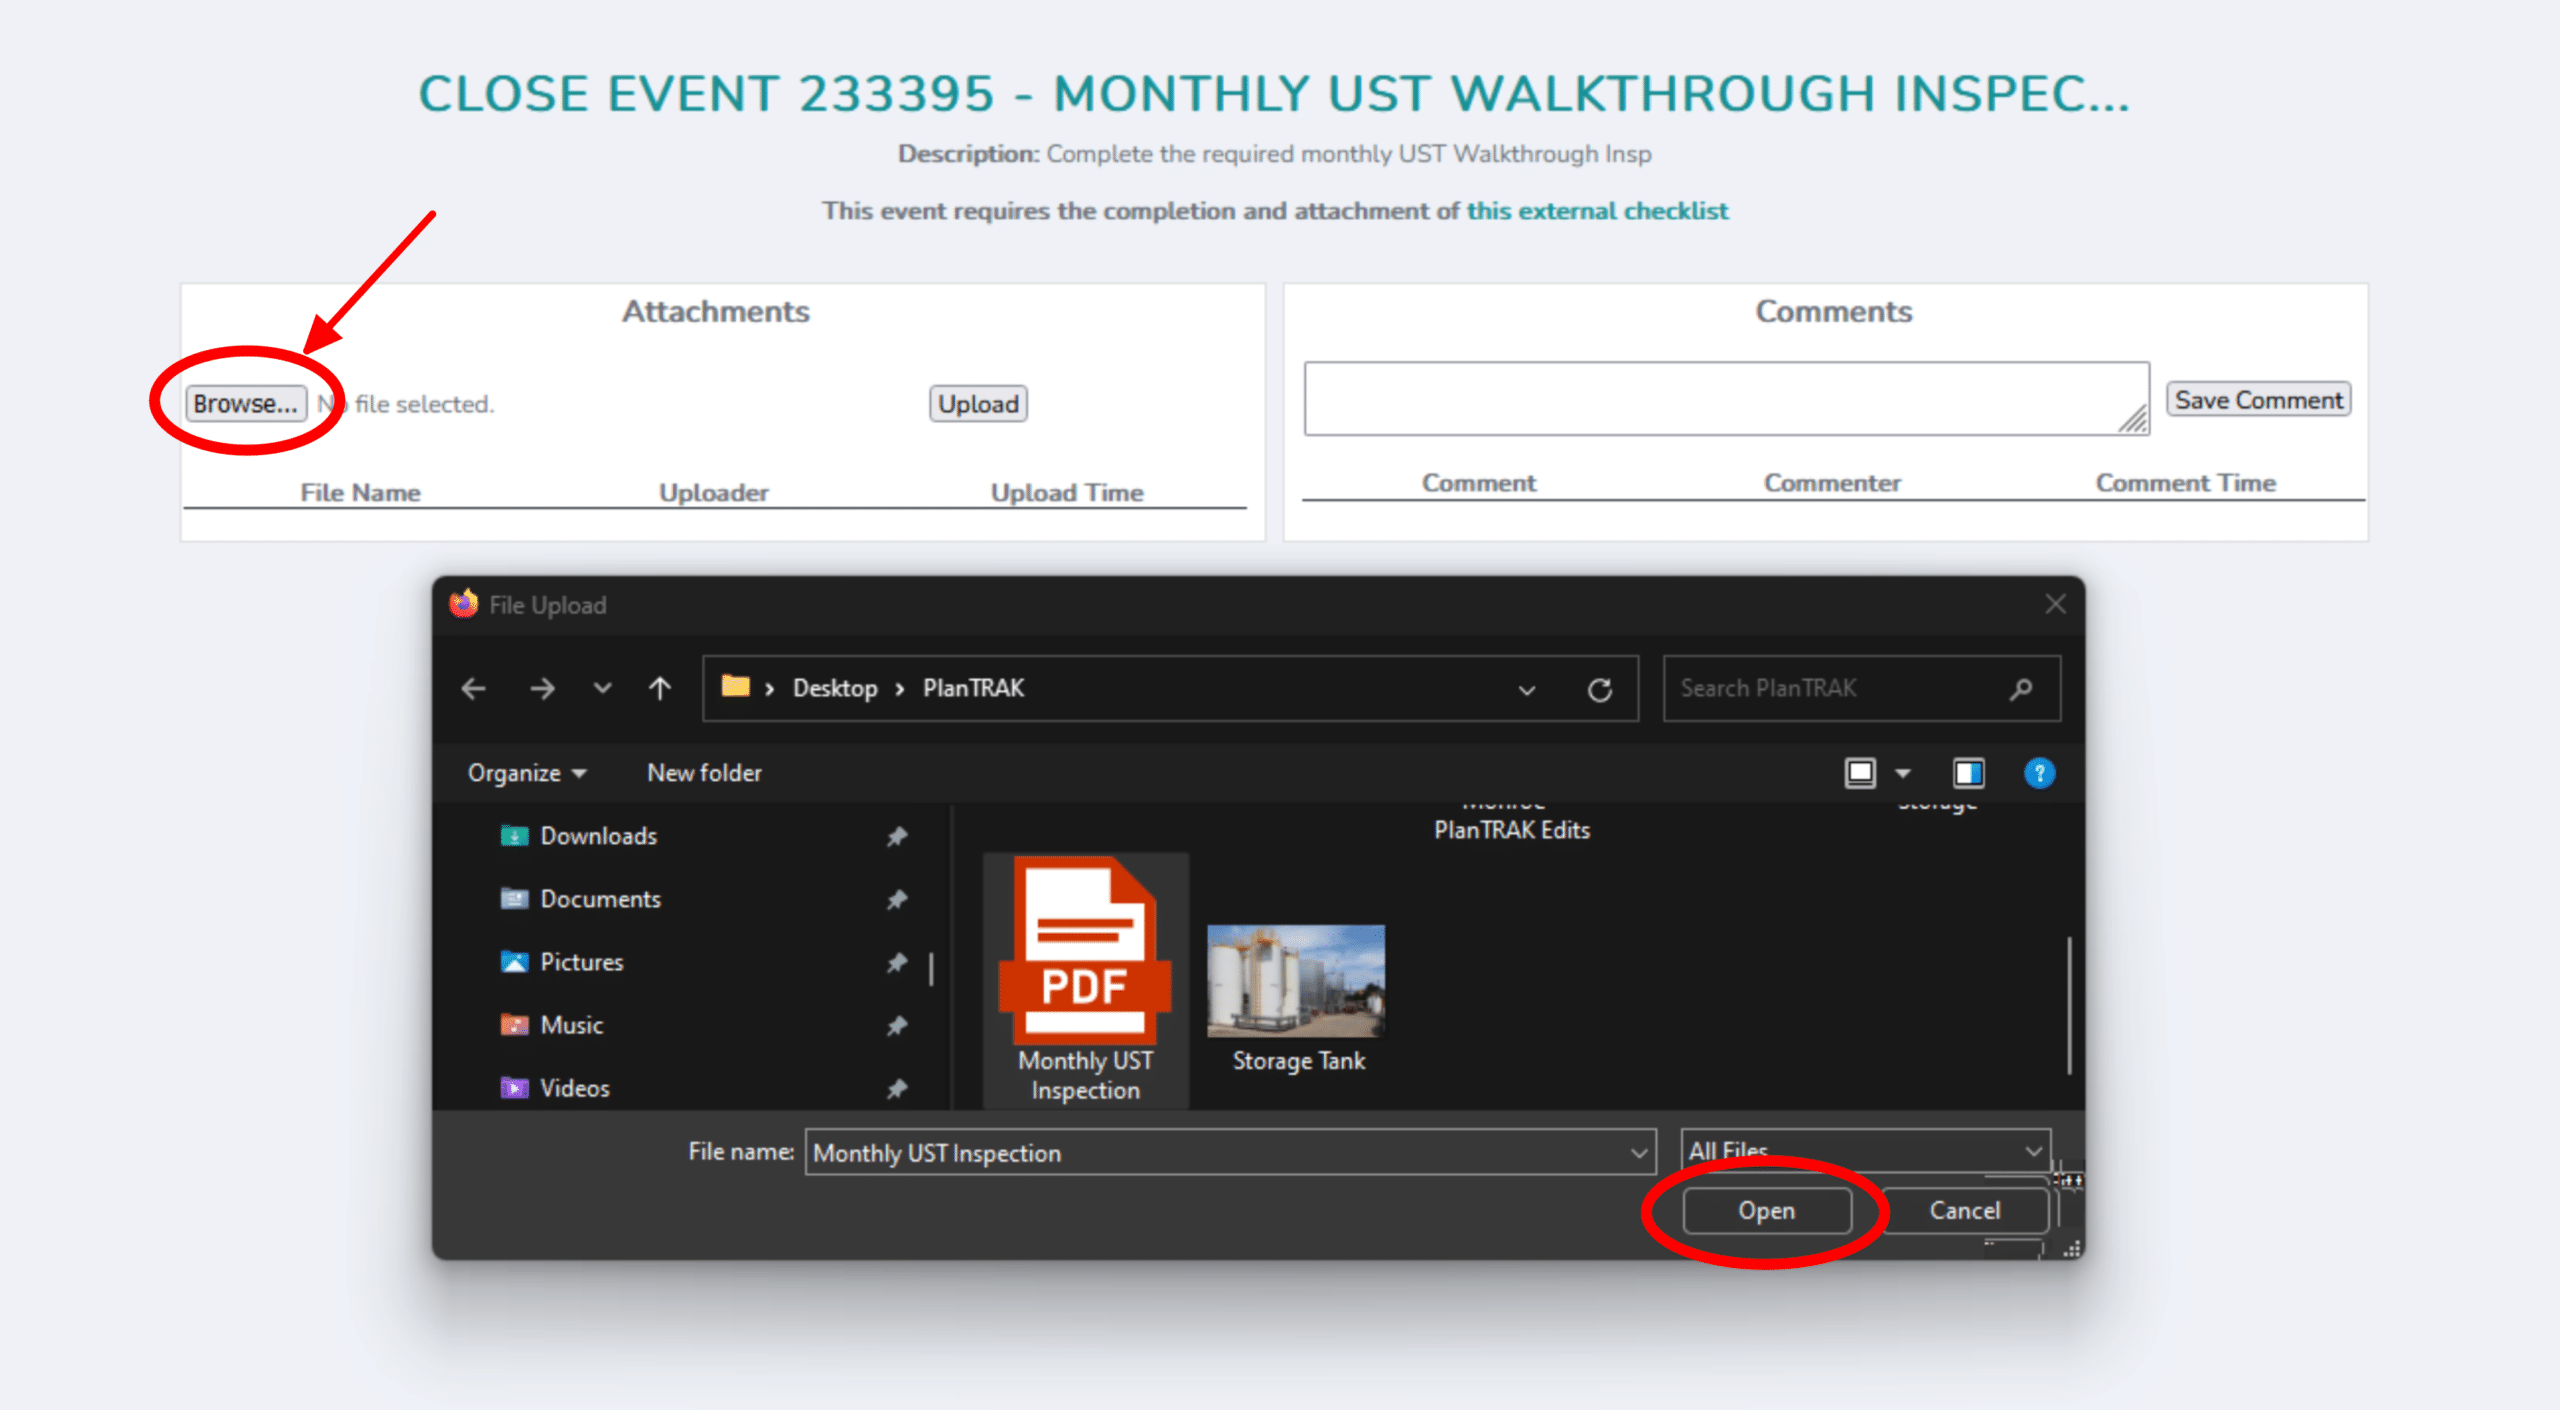
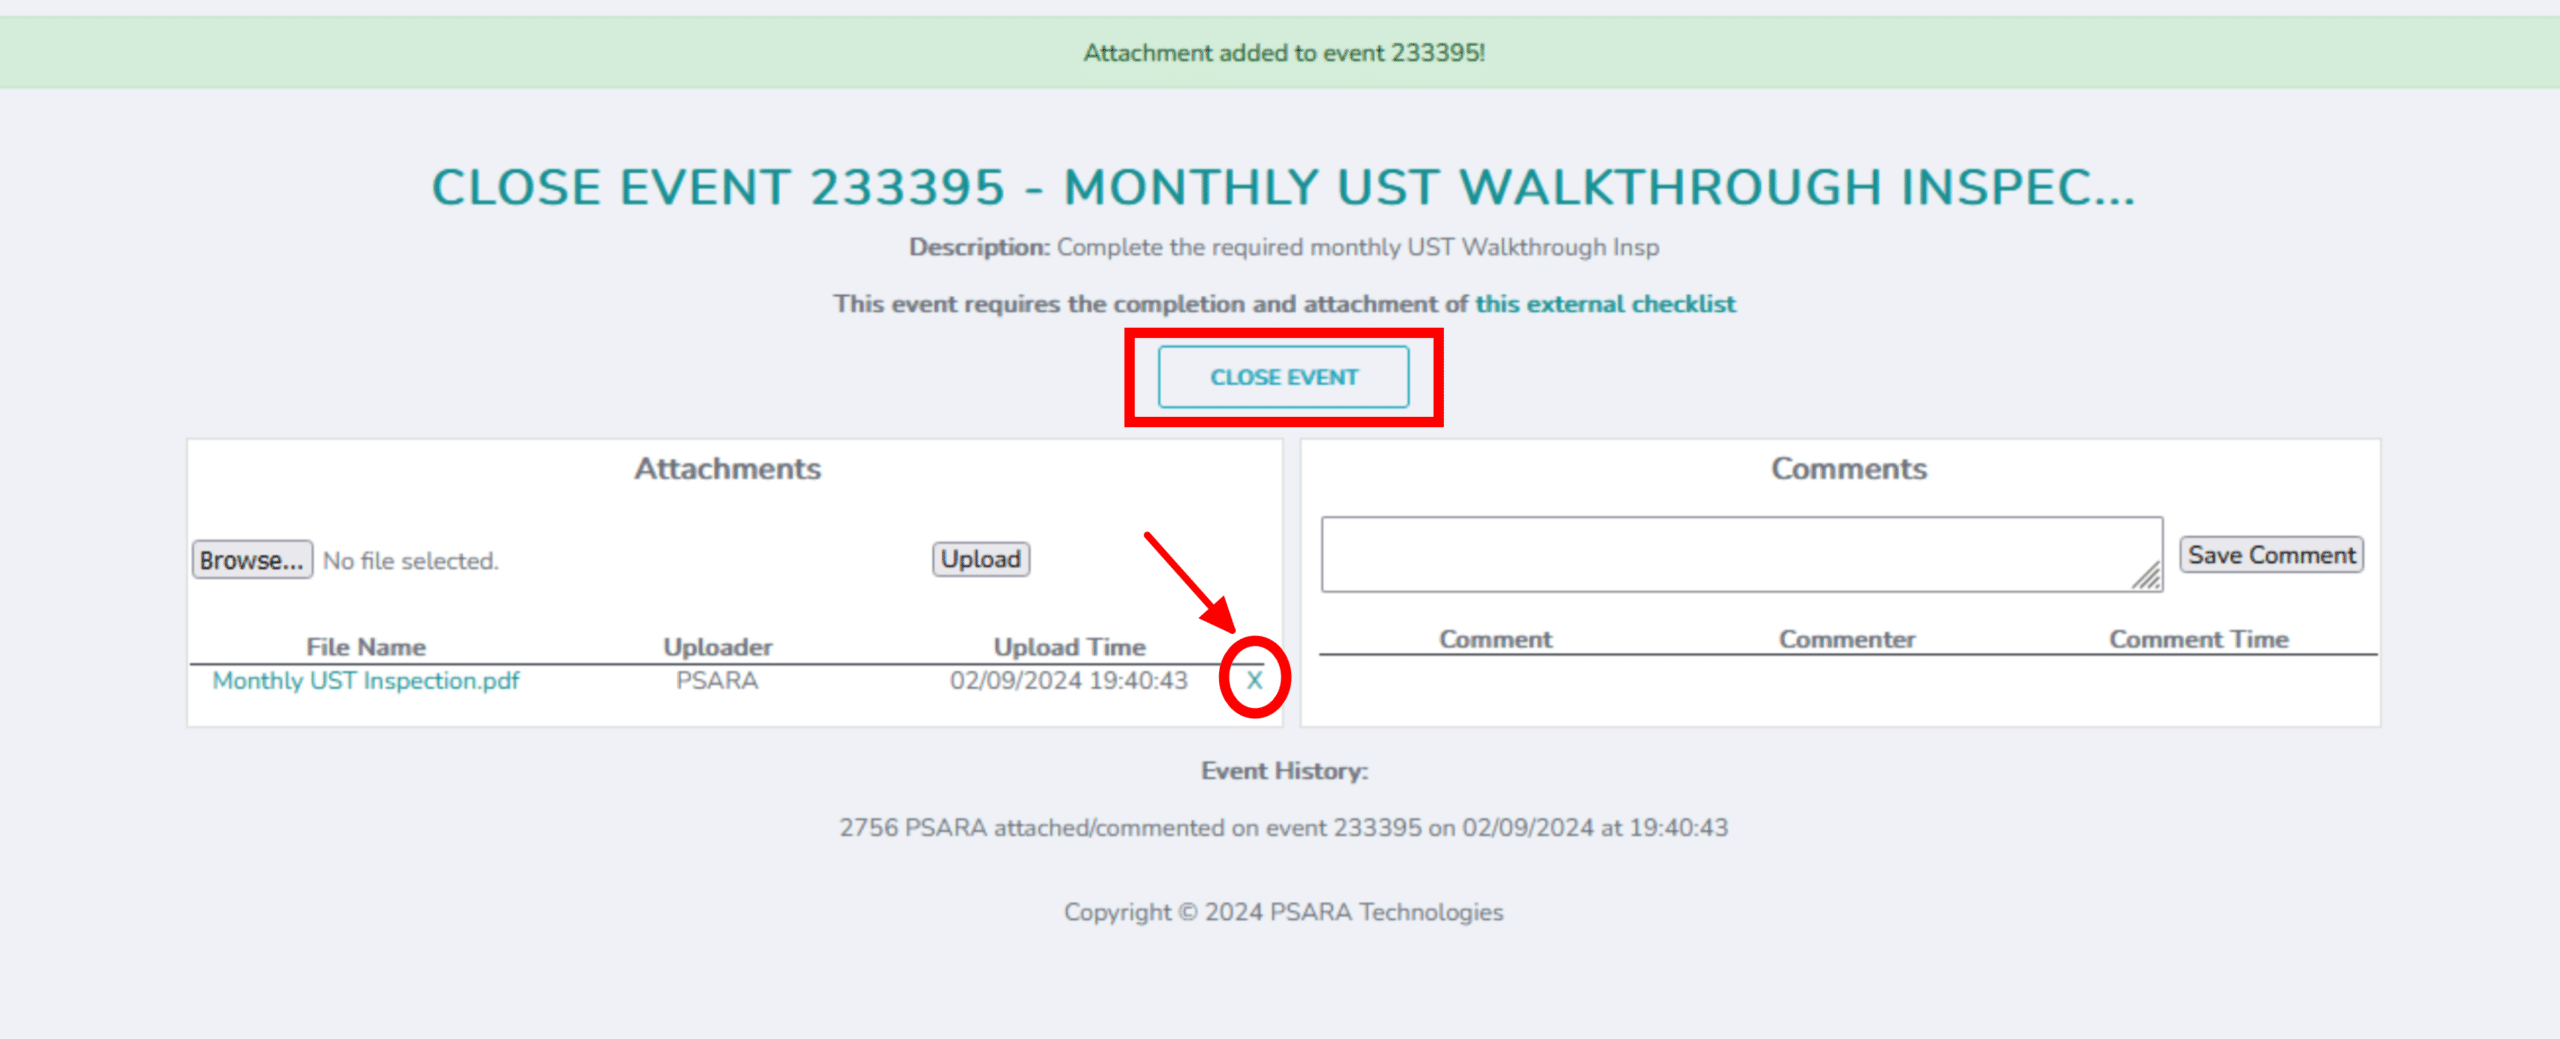
5. Once you have selected the PDF Checklist, click the ‘Upload’ button in the Attachments section to save the PDF to the Event, the following pop-up will appear:
- If nothing requires attention or a follow-up, select ‘No’
- If attention is needed, select ‘Yes’ and a pop-up will appear asking to assign a Corrective Action Event be created. Select the Assigned User, Date, and add any necessary Comments.

6. Once the desired Attachment is uploaded to the Event, the ‘Close Event’ button will appear. Add any necessary Comments and select ‘Close Event’ to close the event.
- If the wrong Attachment has been uploaded or a typo is made in the Comments section, select the ‘X’ icon to delete the Attachment/Comment
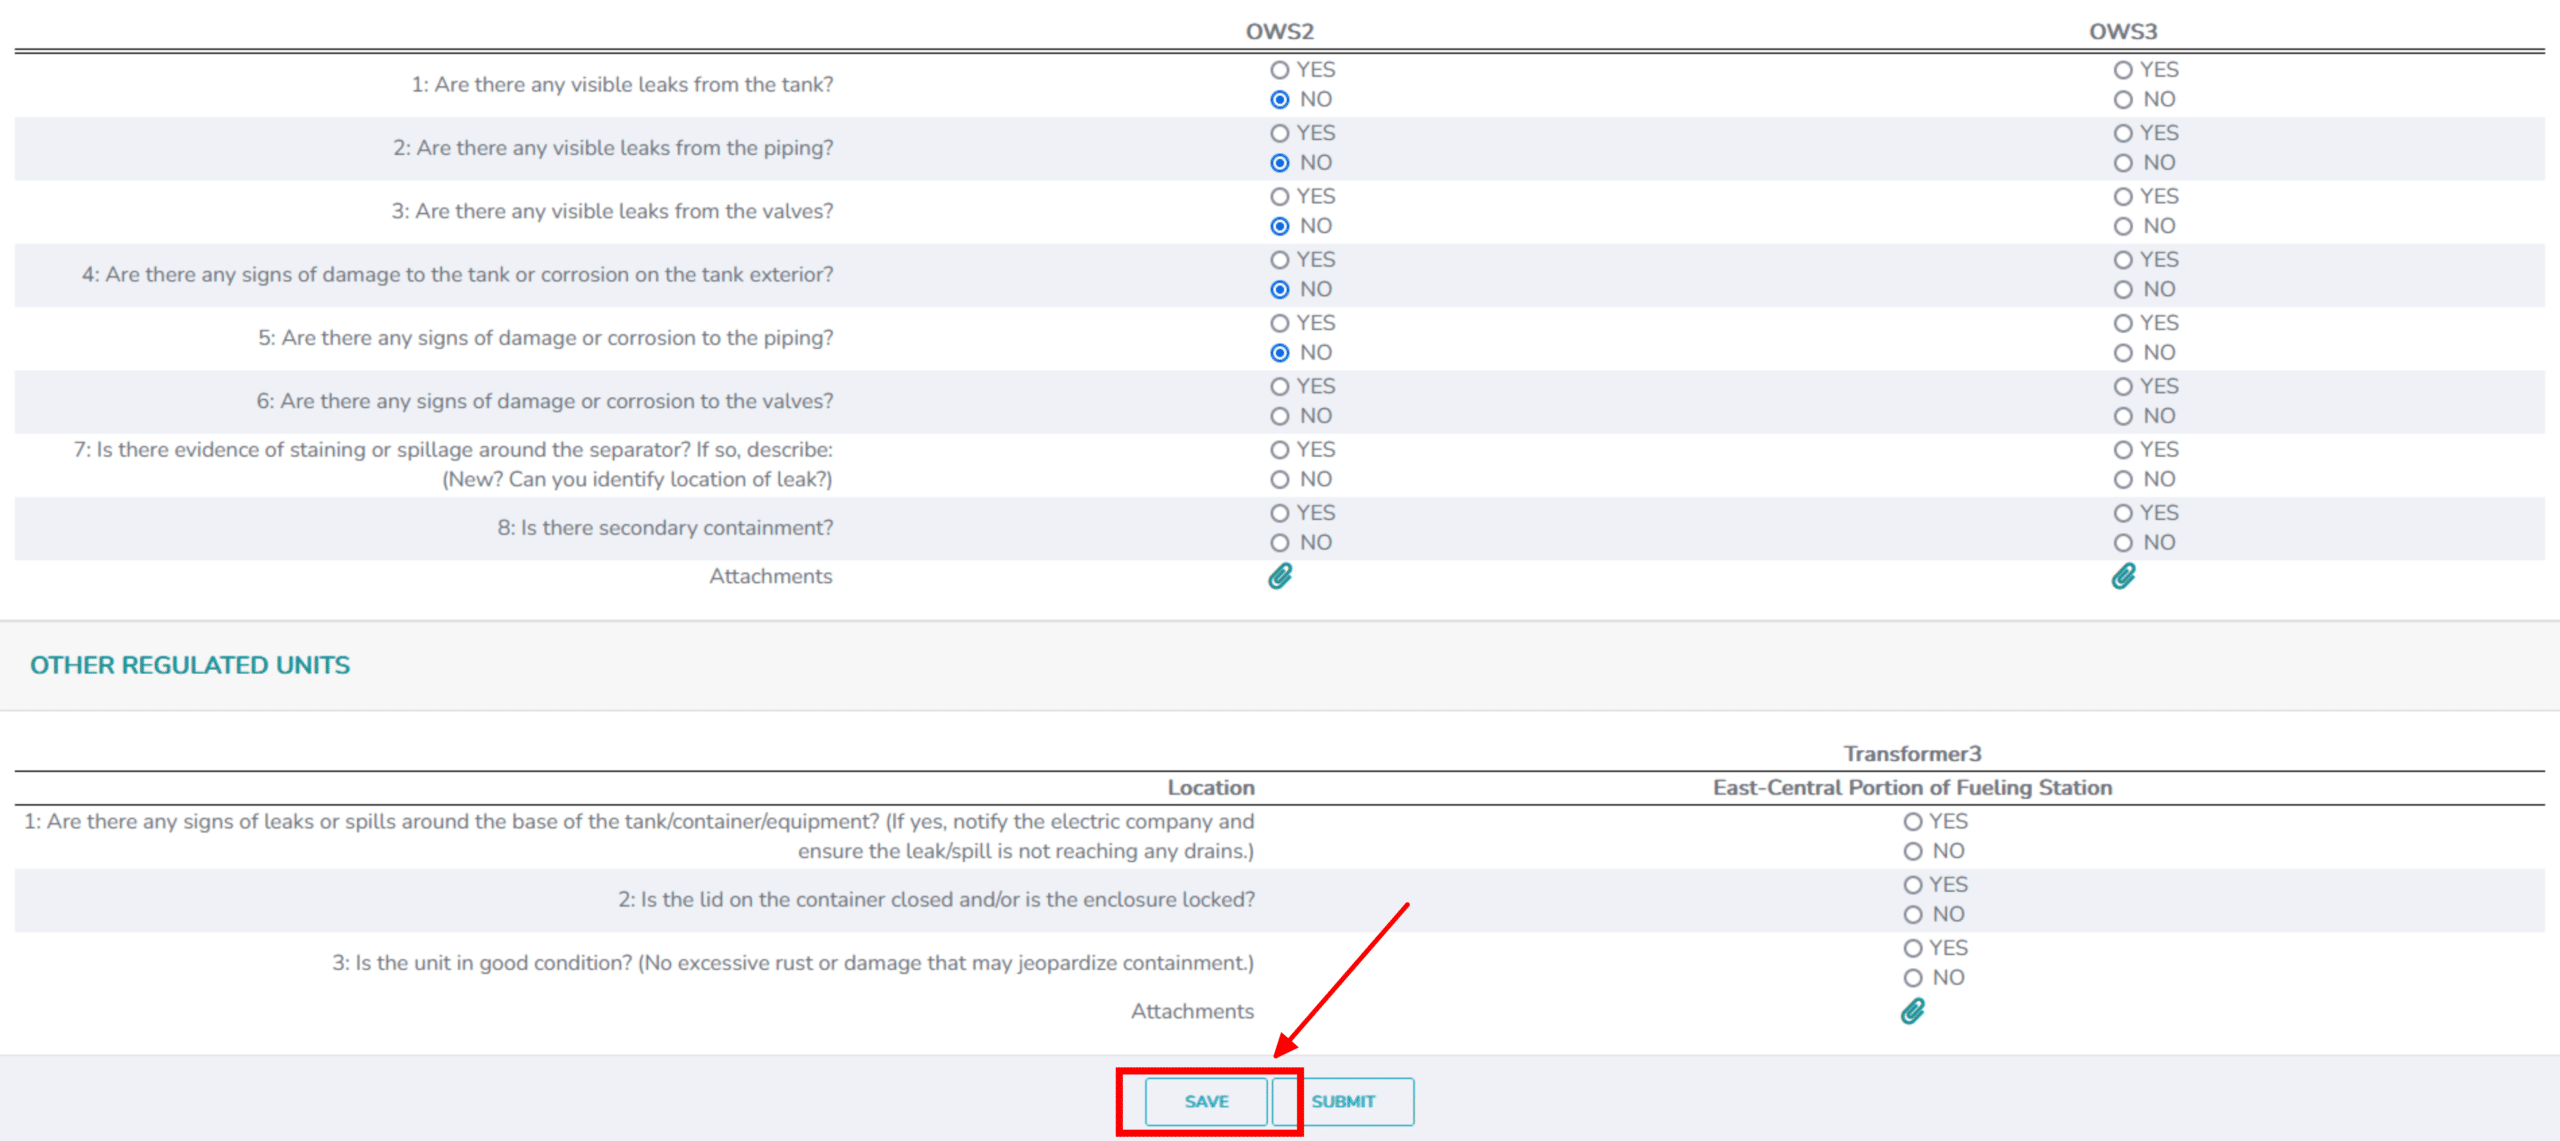
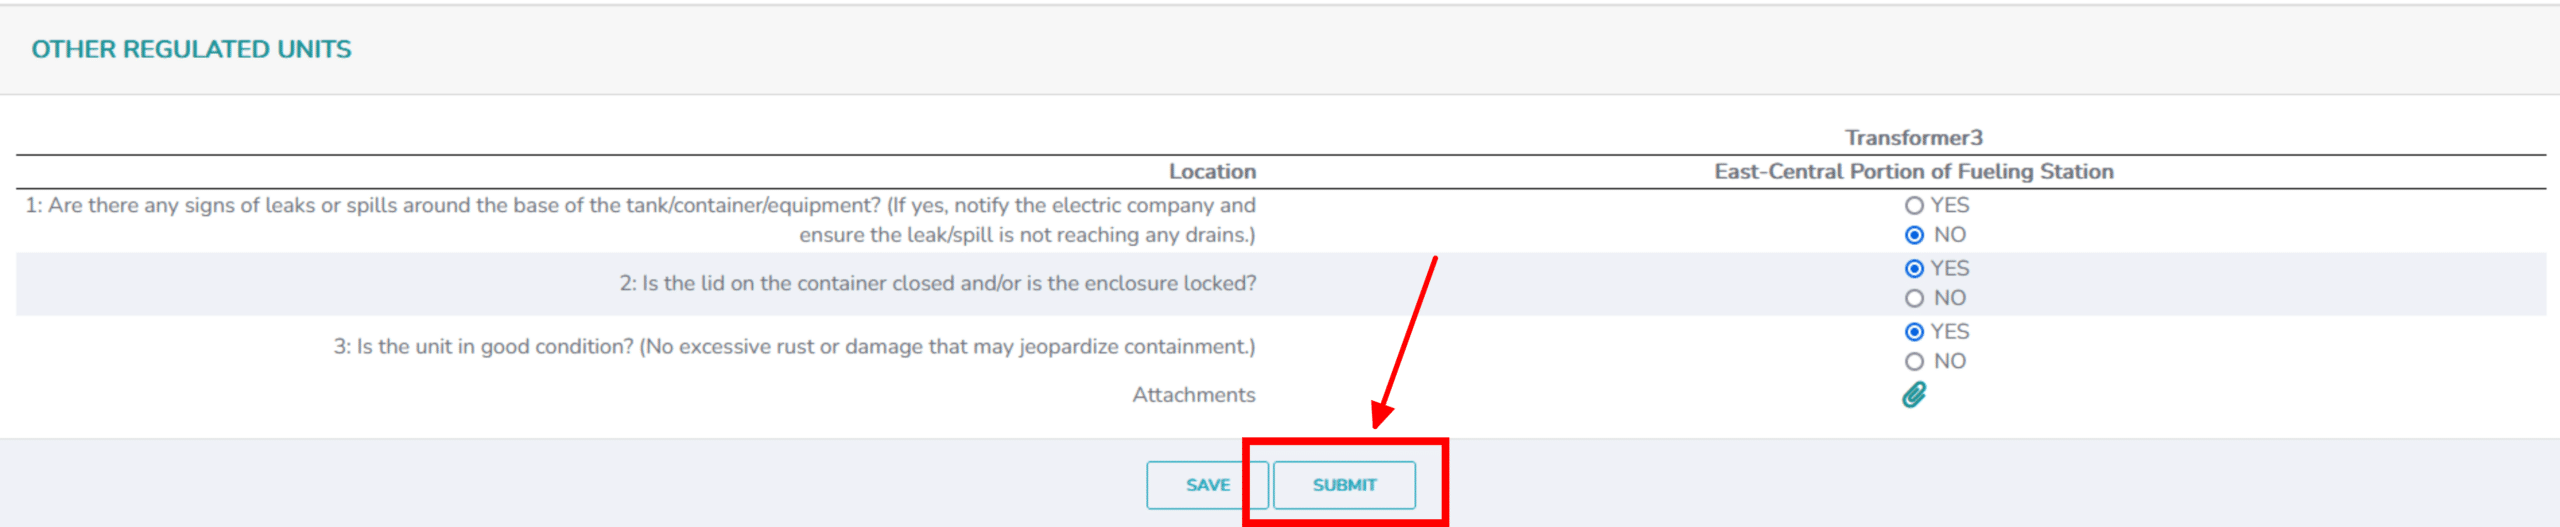
Grid Checklist: #
- Access the desired Checklist, following the above steps.
- Below is style of Checklist that will populate on your screen, please note:
- Each column represents an Item/Area with Item specific information listed below

3. Once you have input the desired answers, add attachments or comments to each column (as needed) by clicking the ‘Paperclip’ icon at the bottom of each column.

4. Once the desired attachment or comment is attached/input, select the ‘Upload’ button to save the attachment/comment to the Checklist

5. To view all attachments/comments added to a given column, select the ‘Paperclip’ icon at the bottom of the column and the following pop-up will appear

6. After completing the Checklist, uploading all necessary documents and comments, select the ‘Submit’ button at the bottom of the checklist
7. If any incorrect answers or deficiencies are answered, you will be redirected to be below screen. This is where you will create a Corrective Action, Plan Item to resolve the deficiency. Input:
-
- Who the Event will be assigned to
- Due Date
- Any necessary or pertinent Attachments or Comments
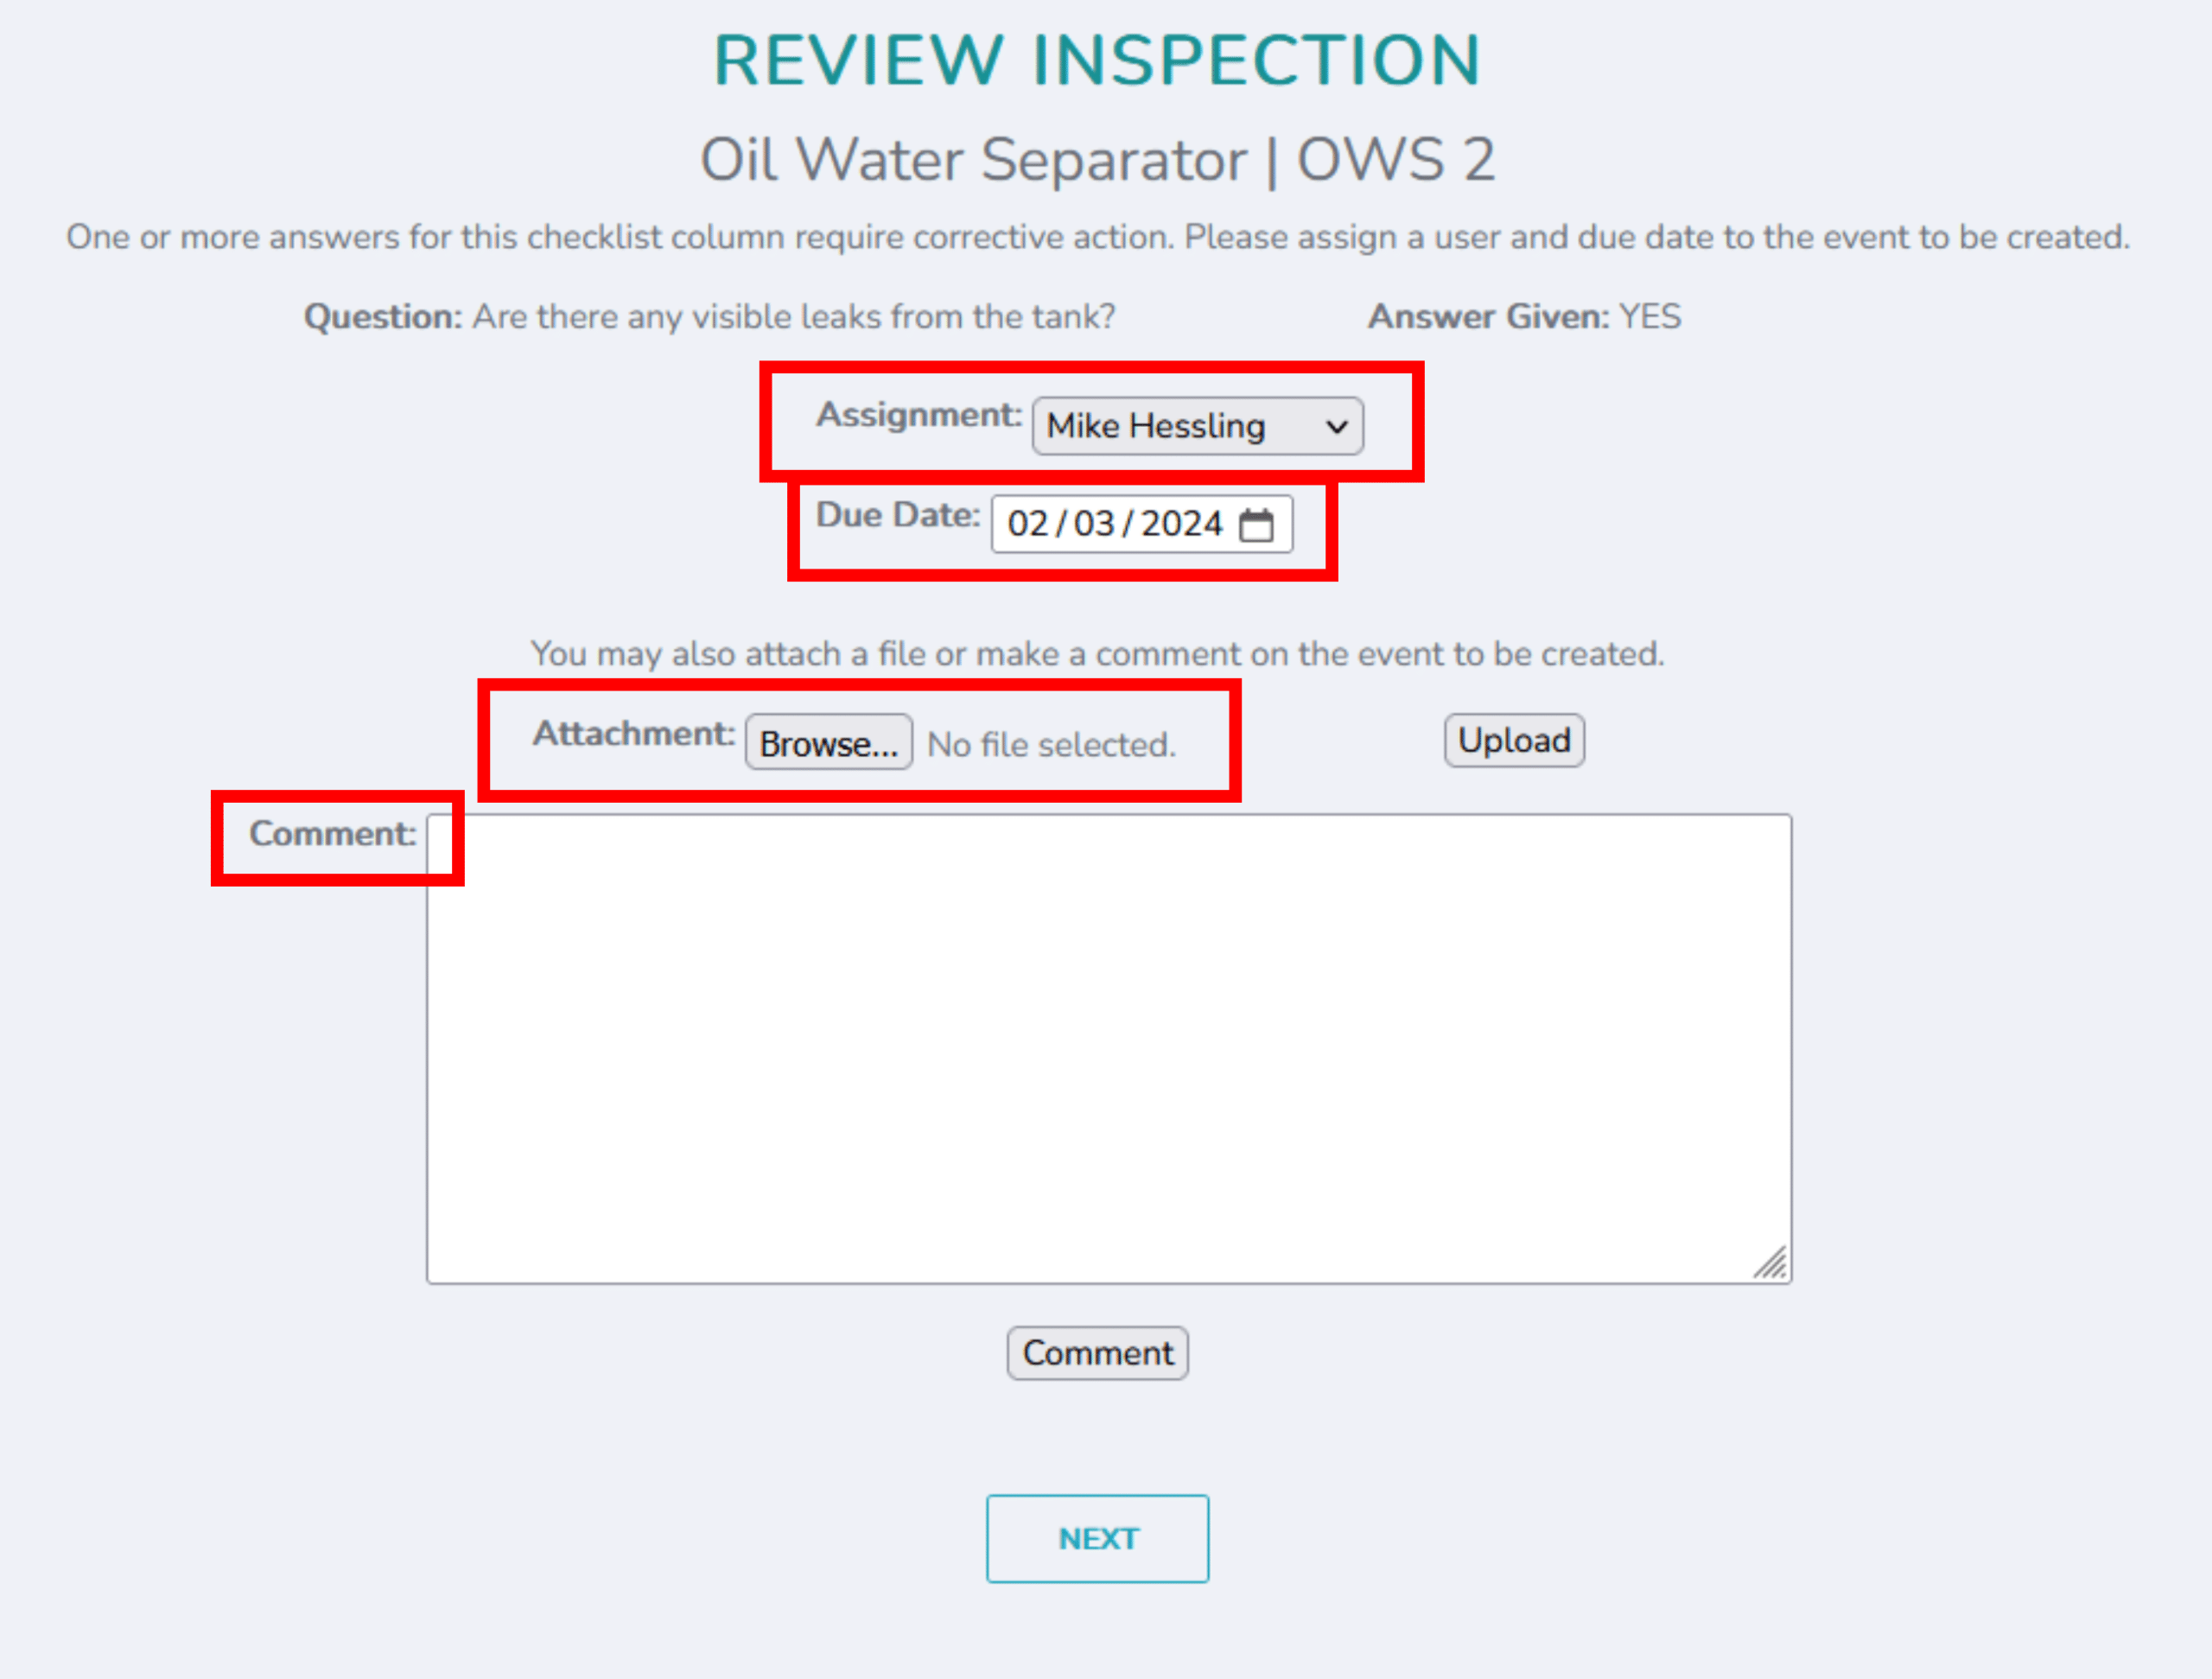
8. Select ‘Next’ and a Plan Event will be created
Default Checklist: #
——
How to Save Work on a Checklist: #
If you need to save a checklist before you’ve completed it, click the ‘Save’ button at the bottom of the page. Use the checklist links mentioned previously to return to your saved checklist.